


Mac OS X makes it possible to launch webpages as standalone apps from Finder without the need to open Safari. This can be quite handy to get to websites quickly and does away with the usual Safari controls for bookmarking and entering web addresses. Besides this, it’s actually quite cool to see a webpage viewed as an app. What’s more, you can tell the website that you’re using an iPhone or iPad and view those sites on your Mac.
This article shows you how to quickly turn any website into an app using Automator.
Create an App with Automator
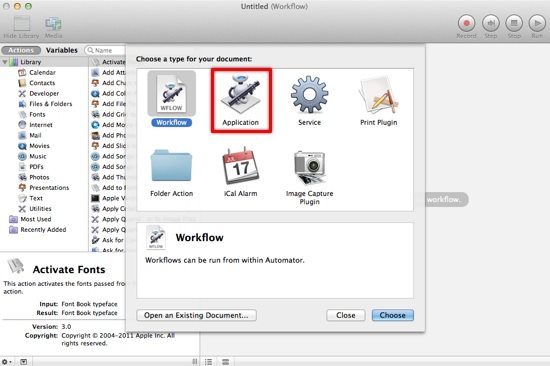
The first step is to open Automator from the Applications folder or type the name into Spotlight. When launched, you’ll be prompted to choose the type of document you’d like to create so select Application and hit the Choose button.
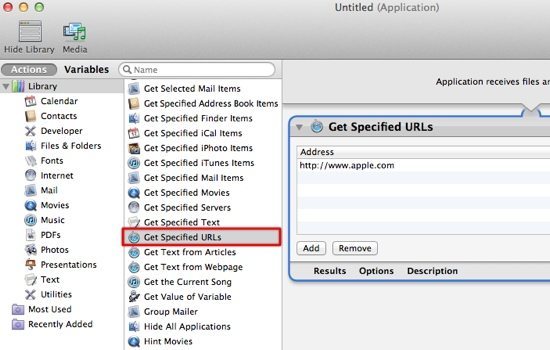
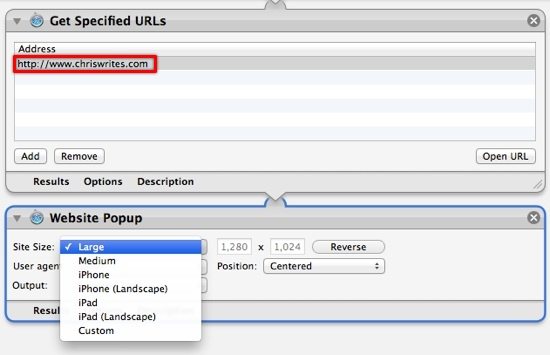
From the left-hand side panel there’s a long list of all the available actions. Scroll down the list (or type it into the search box) until you find Get Specified URLs. Double click the item and it’ll appear on the right hand side with the default settings as follows.
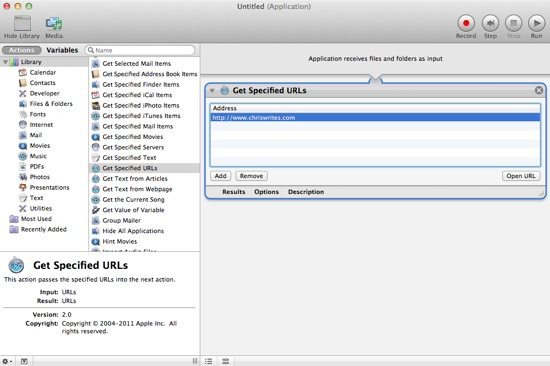
Your Automator screen should now look something like the following. Change the default address in the Get Specified URLs box on the right to the website of your choice.
Now locate the Website Popup action in the list – it’s probably quicker to enter the name in the search field. Once you’ve found it, double click to add to the list of actions on the right as shown below.
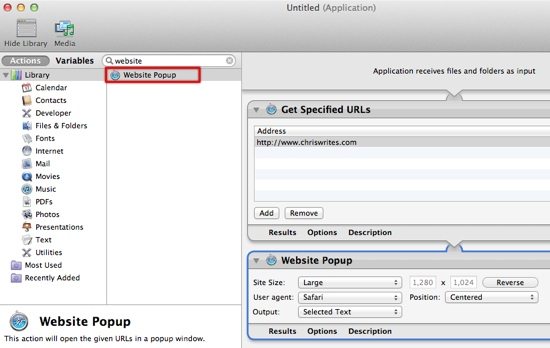
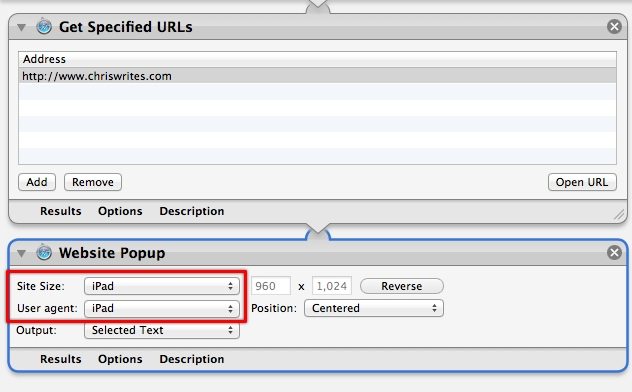
The two actions you’ve configured should now contain the website you want to use in the top box, and the lower box presents several options to control the website’s size and user agent (i.e. which browser you are using). For example, you could view the website as it’s intended to be viewed on an iPad or iPhone. There are also options to set the position on screen (such as Centered). Just choose the settings that you feel are most appropriate.
In our example, we’ll view the Chris Writes website correctly sized for an iPad and so we’ll also set the user agent iPad. This setting tells the web server what device we’re using (or, fools it into thinking we’re on another type) and therefore it’ll give us a version of the site optimised for that type of device if available.
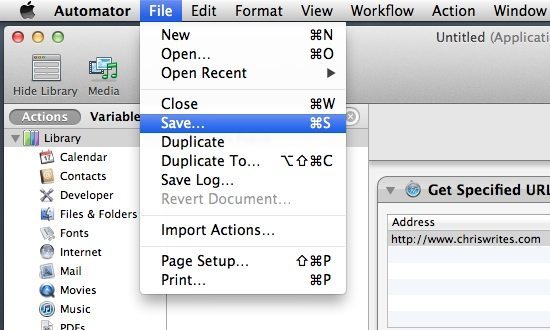
Now that the configuration is complete, select Save from the File menu to finalise everything.
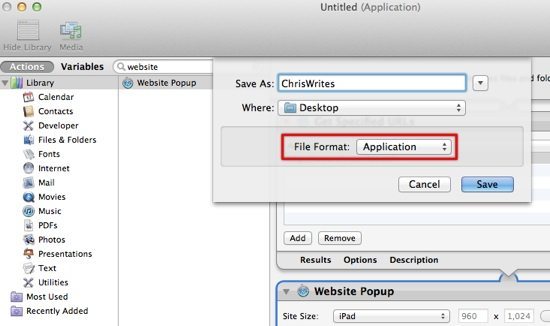
When prompted, enter an application name and save location. The file format should be Application. Next, hit the Save button to finish and create the app.
Automator saves your app in the specified location (such as the desktop) and assigns it the default Automator icon (though you can easily customise icons in Mac OS X).

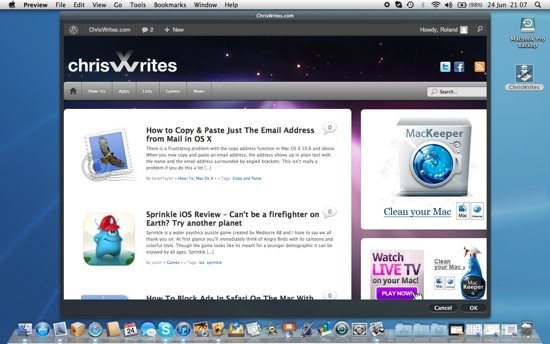
Finally, double-click the new icon to launch the app. Depending on which options you’ve selected and the target device, you should see something like that shown below. In this example we set the size so we get a page optimised for an iPad. Note the Cancel and OK buttons at the bottom right of the app – both buttons close the app. A small spinning cogwheel also appears on your main menu bar – you can also close the app by clicking on that and then the little “x” button.
Now that you know how to turn any website into an app, you can create dozens more and easily access them from the Dock or Finder, or even access iPhone and iPad-specific versions of websites on your Mac!
Before you go
After spending over 20 years working with Macs, both old and new, theres a tool I think would be useful to every Mac owner who is experiencing performance issues.
CleanMyMac is highest rated all-round cleaning app for the Mac, it can quickly diagnose and solve a whole plethora of common (but sometimes tedious to fix) issues at the click of a button. It also just happens to resolve many of the issues covered in the speed up section of this site, so Download CleanMyMac to get your Mac back up to speed today.


This is pretty cool and a nice tip! Many thanks!!