


If you’re desperate to try the new features coming up in Sierra, the good news is that you don’t have to wait until autumn – you can get your hands on the Sierra beta today.
However, before you install Sierra (or any software that has the beta label) just be aware that “beta” pretty much means unfinished. Beta software is much more likely to have bugs, issues and incompatibilities than finished software – in fact, Apple put out these pre-releases specifically to get feedback from users on what’s not working right.
Despite its unfinished status, installing the Sierra beta doesn’t have to be a nerve-wracking experience. Even if the worst happens and your Mac refuses to boot after you install Sierra, there are steps you can take to get your laptop up and running again. In this article, I’m going to share these steps with you, so you’ll know exactly what to do, even in the worst case scenario. Think of this as your guide to installing the Sierra beta – complete with built-in safety net!
Just be aware that fixing Sierra-related issues takes time, so just to be on the safe side only install the beta when you have an extra hour to spare, just in case something does go wrong. You definitely don’t want to try installing Sierra on your work computer in the middle of the day!
Before we start
So you’ve decided to take the plunge, but before you even think about downloading Sierra, make sure you’ve created a full backup of everything on your Mac, so you have something to restore just in case it all goes wrong.
While the worst is unlikely to happen, you don’t want to be that one unlucky person who stumbles into an issue and ends up losing everything on their laptop, just because they didn’t take a few minutes to create a backup!
If you’re running OS X 10.5 or above, then you already have access to a built-in backup tool, known as Time Machine. Time Machine is easy to setup, and once it’s configured it’ll just run in the background, automatically creating backups every hour. When it runs out of space, Time Machine will automatically start replacing older backups with newer ones, making it one of the easiest ways of ensuring you always have an up-to-date backup of everything on your Mac.
The catch is that Time Machine does require a hard drive that’s at least the same size as your Mac’s internal drive, so you’ll need to invest in one of these if you don’t already own one.
Attach the drive to your Mac, and you’re ready to setup Time Machine:
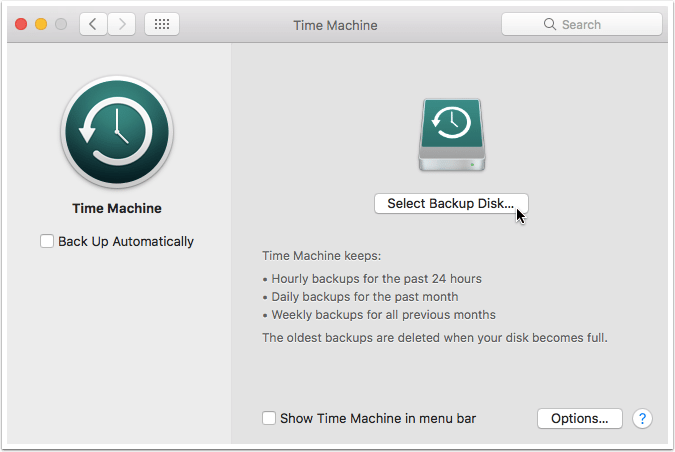
- Select the Apple icon in your Mac’s menu bar, followed by ‘System Preferences…’ and ‘Time Machine.’
- Click the ‘Select backup disk…’ button, select the drive you want to use for your backups, and click ‘Use Disk.’
- Set the slider to ‘On.’ If you haven’t already formatted your drive as macOS Extended, Time Machine will prompt you to do so. Formatting will erase all the files on your hard drive, so if there’s anything you want to hang onto then make sure you stash it away somewhere safe before formatting your drive.
- If there’s any files, apps or other items that you want to exclude from your backups, then click the ‘Options…’ button. Click the ‘+’ icon, followed by all the items you don’t want to backup, then click ‘Exclude.’

And that’s it! Time Machine will now automatically create a backup every hour. You can also trigger a backup manually at any time by opening your ‘System preferences…’ and selecting ‘Time Machine,’ followed by ‘Back Up Now.’
Installing the Sierra Beta
Once you’ve created your backup, it’s time to install the beta. Head on over to Apple’s Beta Software Program page and do the following:
- Sign up with your Apple ID.
- Make sure the ‘macOS’ tab is selected.

- Select the ‘Enroll your Mac’ link. This takes you to a new screen containing a redemption code that you can type into the App Store, plus a ‘Redeem code’ button. Since it’s quicker to just use the button, give ‘Redeem code’ a click. The App Store should launch automatically.
- Enter your Apple ID and password when prompted.
The App Store will guide you through the process of downloading the Sierra installer. The installer should launch automatically, but if it doesn’t open your Mac’s ‘Applications’ folder and double-click the ‘macOS Sierra Public Beta’ file.
Follow the onscreen instructions to install the Sierra beta. Then, the only thing left to do is click the ‘Restart’ button, and Sierra will be installed on your machine!
You’re now ready to explore everything that Sierra has to offer – unless, of course, something goes wrong…
If things don’t go to plan
Since Sierra is currently in beta, you may encounter issues at pretty much any point – when you’re installing the beta, the first time you reboot your MacBook – or even when you’re just performing everyday tasks on your laptop!
These issues may be small, such as an app that refuses to run on Sierra, or they may be large such as system features becoming unstable and buggy. Worst case scenario, your MacBook may even freeze up and display an error message everytime you try to start it.
Whatever issues you’re struggling with, don’t panic! There’s a couple of ways you get can get your MacBook back on track.
- Restore a Time Machine backup
The less drastic option, is to revert to a time when your Mac was running smoothly. This may mean restoring a backup of when you were running Sierra without any issues, or it may mean restoring your Mac to its pre-Sierra state.
Just be aware that when you restore a backup you’ll lose all changes you made inbetween creating this backup, and now. If there’s a file, folder, or other item you want to hang onto, then make sure you place it somewhere safe, such as in your DropBox or Google Docs account, or save it to a USB stick.
In order to restore a backup, you need to boot into OS X Recovery, which is MacBook’s built-in recovery system.
You can only enter Recovery mode while your MacBook is booting, so restart your computer. Then, as it’s loading, hold down the ‘Command’ and ‘R’ keys on your keyboard until you see the Apple logo. If your timing is right, your Mac will boot into Recovery and you’ll see the OS X Utilities window.
Select ‘Reinstall from Time Machine Backup’ and follow the onscreen prompts to select the backup you want to use, and then restore this backup.
- Reinstall MacOS
Even if you encounter an error and didn’t take the time to backup your MacBook first(tut, tut) then all is not lost. You can still get out of this sticky situation, but the bad news is that you’ll need to reinstall your entire operating system from scratch.
This is a pretty extreme measure as it wipes everything, effectively acting as a factory reset for your Mac. However, if you didn’t create a backup then this may be your only option – hopefully, you’re the kind of person who stores their important files online, via services like DropBox, Google Docs, Photos and iCloud, so you won’t have lost everything.
To reinstall, launch Recovery mode (by holding down the ‘Command’ and ‘R’ buttons on your keyboard while your Mac is booting) and then select ‘Reinstall OS X’ from the the OS X Utilities window. Follow the onscreen instructions to reinstall your operating system, and then restart your Mac.
Since this move re-installs your entire OS, you’ll get that fresh-out-of-the-box MacBook experience, which means you’ll need to work your way through Apple’s standard setup screens before you can use your laptop – everything from re-entering the password for your home WiFi, to setting your timezone and agreeing to Apple’s terms and conditions.
It’s worth noting that once you’ve installed the Sierra beta, Recovery mode seems to use this as your machine’s default OS, which means when you select ‘Reinstall OS X,’ it’ll attempt to re-install the Sierra beta. However, from personal experience I’ve found that re-installing the beta from scratch can suddenly, and inexplicably resolve issues you’ve been experiencing (this is just some of the strange behaviour you can look forward to when you’re dealing with beta software!) so even if your Mac has been suffering with major Sierra-related issues, this is still worth a shot!


Add Comment