

Gaming on a Mac may not be quite as popular as gaming on a PC, but increasingly game developers are taking the time to ensure their titles are compatible with macOS – and we’re even starting to see some games that are designed specifically for Macs!
However, if you’ve ever tried gaming on your Mac, then chances are you quickly discovered that the traditional keyboard and mouse don’t quite cut it.
Before you run off and purchase a new gaming controller, take a look at the controllers you already own, as many of them can be convinced to play nicely with macOS.
In this article, I’ll show you how to connect an Xbox One controller to your Mac. While this does take a little more effort than connecting some other gaming controllers, I’ll show you how to setup and use a third party macOS app, that adds complete Xbox controller support to macOS.
Adding Xbox controller support to macOS
The “Xbox Controller Driver for macOS” is a free piece of software that allows you to interact with your Mac, using a range of Microsoft Xbox controllers.
In this article, we’ll be focusing on adding support for the Xbox One controller, but it’s also worth noting that this driver supports:
- The original Xbox controllers, with the help of a USB adapter.
- The Xbox 360 controllers, on macOS Yosemite or earlier. In macOS 10.11 and later, Xbox 360 controller support has been known to cause “kernel panics,” where the user is prompted to reboot their system. If you want to use an original Xbox controller, then you’ll either need to downgrade to an earlier version of macOS, or dual boot your Mac.
This driver also supports all devices that work with the Xbox series of hardware, such as wheels, sticks, and the Xbox One Elite controller, plus various licensed third party controllers from brands such as Hori, MadCatz, and Logitech.
Getting started with the Xbox Controller Driver
To setup the Xbox Controller driver:
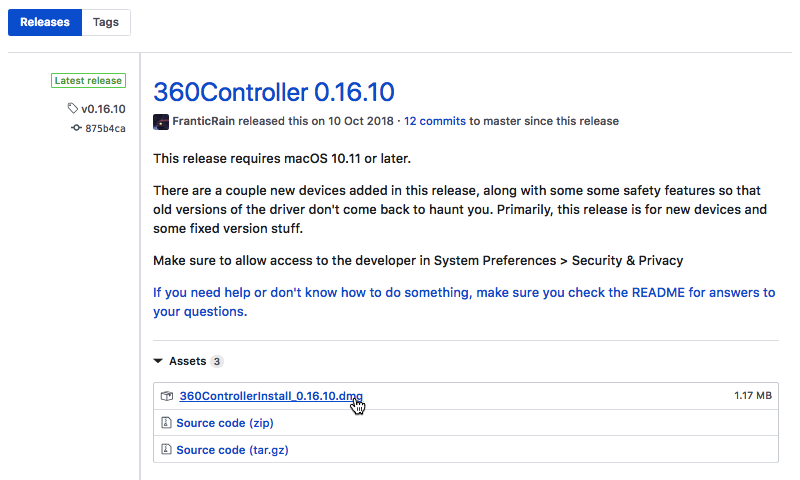
- Head over to the project’s GitHub page and download the latest release. There’s several packages available for every release, so make sure you download the “.dmg” file (where the cursor is positioned in the following screenshot).
- Once the file has downloaded, launch it and follow the onscreen instructions to install.
- You’ll need to restart your Mac, so make sure you’ve saved any files you’ve been working on!
- When prompted, restart your Mac.
Configuring your Xbox controller
To create the connection, attach your Xbox controller to your Mac. Depending on your model of Mac, this may require you to use a micro-USB cable, or a USB-C to USB-A adapter.
At this point you may encounter a “System Extension Blocked” message. To remove this block:
- Dismiss the warning message.
- Select the “Apple” logo from your Mac’s menu bar.
- Navigate to “System Preferences… > Security & Privacy.”
- Select the “General” tab.
- Click the little padlock icon in the bottom-left corner, and then enter your admin password when prompted.
- Select “Allow.”
Once your Mac is no longer complaining about the “System Extension Blocked” error:
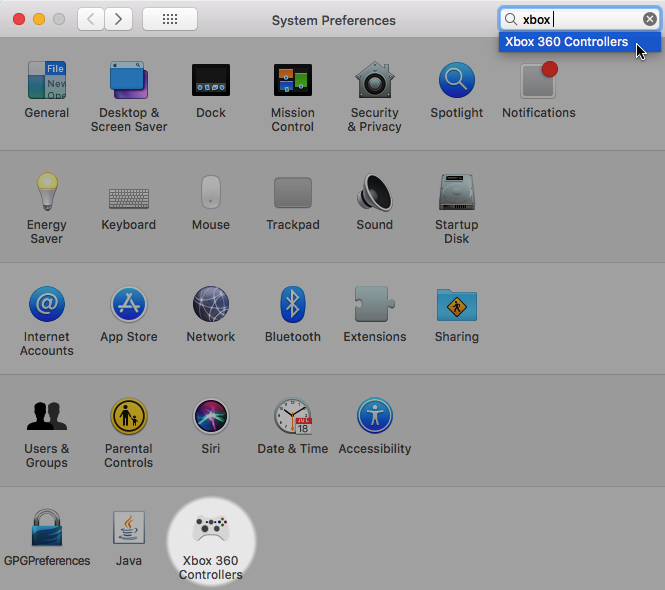
- Open your Mac’s “System Preferences…”
- The “System Preferences” should now contain a “Xbox 360 Controllers” option; give it a click.
- In the subsequent “Xbox 360 Controllers” window, make sure the “Controller Test” tab is selected.
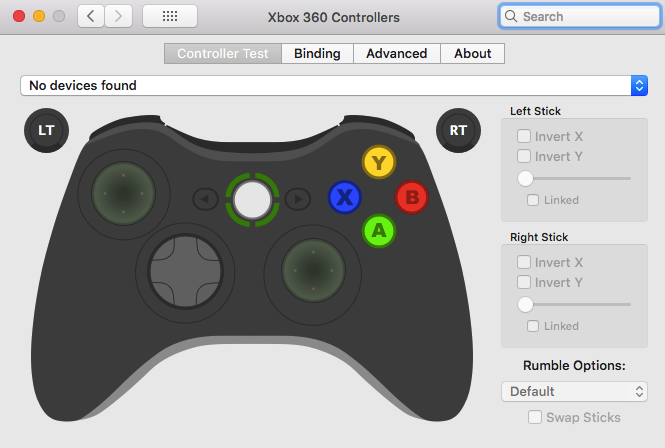
- Open the “Devices” dropdown, and then select your Xbox controller.
You should now be able to play any game on your Mac, using your Xbox controller.
Help, my controller isn’t working!
Although attaching a controller to your Mac may sound straightforward, in reality you’re using a third party program, with a third party piece of hardware, on an operating system that was never designed to support Microsoft products, and with a game that was potentially never designed to be played on macOS.
That’s a lot of variables, so it’s possible you may encounter one, or more of the following errors:
I’m pressing the buttons and rolling the joystick, and nothing’s happening
If the controller is appearing in your “System Preferences…” but you aren’t getting any response when you try to interact with the controller, then macOS may be to blame.
In macOS 10.11, Apple changed some of the underlying USB code, which can cause problems for Microsoft-licensed controllers. You should be able to resolve this problem, by downgrading to macOS 10.10 or earlier.
If you’re not wild about the idea of downgrading, then you can try dual booting your Mac instead. Assuming you’re running High Sierra or later, you’ll need to create a new volume:
- Navigate to “Applications > Utilities.”
- Launch the Disk Utility app.
- In the Disk Utility toolbar, select “View > Show All Devices.”
- In Disk Utility’s left-and menu, select an existing APFS volume, and then select the “Volume: Add” button.
- Give your APFS volume a name.
- Open the “Format” pop-up menu, and then select a format. If you’re using macOS 10.13 or later, then APFS is the recommended format.
- Select “OK” followed by “Add.”
Next, you need to download the installer for the version of macOS that you want to install. Ideally, you’ll be dual booting a version of macOS that you previously downloaded, as this means you’ll be able to re-download the installer from the App Store.
If you want to install a version of macOS that you never downloaded from the App Store, then you’ll have to enlist the help of another Mac user. macOS installers aren’t user-specific, so if you have a colleague, friend or family member who has previously downloaded this version of macOS, then they’ll be able to download the necessary installer, and then share it with you, for example via a USB drive or a service like Dropbox.
Once you have your installer and partition, you’re ready to install a second version of macOS:
- Double-click to launch the installer.
- When asked to select a destination, make sure you choose the volume you just created.
Your new version of macOS will now be installed on your new volume.
Once it’s installed, you can switch between these versions of macOS at any time, by restarting your Mac while holding down the “Alt/Option” key. When prompted, select the partition that you want to access, and your Mac will then boot into this version of macOS.
Once you’ve booted into an earlier version of macOS, you should be able to use the Xbox controller without any issues.
macOS isn’t registering the controller
If the controller isn’t appearing in your “System Preferences,” then you may have accidentally connected your controller using a “charge” micro USB cable instead of a “data” table.
To check whether this might be the case:
- Select the “Apple” logo from your Mac’s menu bar.
- Navigate to “About this Mac > System Report…”
- In the subsequent window, select “Hardware” from the left-hand menu, followed by “USB.”
If your controller doesn’t appear in this window, then it’s likely the cable isn’t sending data, and you should try using a different cable.
The controller doesn’t work with my favourite game!
When using an Xbox controller on macOS, there’s lots of different variables that can prevent the controller from working as expected, including different games.
Just because your controller works perfectly with one game, doesn’t automatically mean it’ll work perfectly with every game. If you’re experiencing problems with a specific game, then the driver has a “Pretend to be an Xbox 360 Controller” toggle that’s designed to trick games into successfully recognising your controller.
To try this workaround:
- Select the “Apple” logo from your Mac’s menu bar.
- Navigate to “System Preferences… > Xbox 360 Controllers > Advanced.”
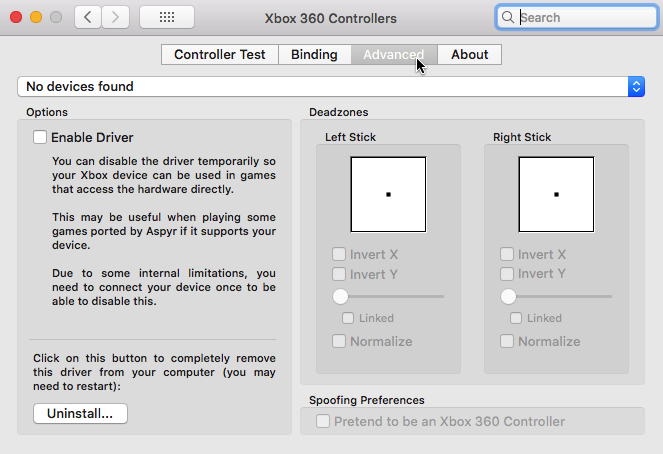
- Find the “Pretend to be an Xbox 360 Controller” checkbox, and select it.


Add Comment