


Kodi is a free media player that allows users to stream films and TV programmes over the Internet. Kodi can run on a wide range of platforms, from computers, to smartphones, tablets, set-top boxes, and even on devices like Raspberry Pis and Amazon Fire TV sticks!
By default, Kodi doesn’t contain any actual content, but there’s a huge range of community-created apps, known as “add-ons” that you can download and run inside your Kodi player. These add-ons give you access to a huge amount of content – from films, to TV shows, live TV streams, and even major sporting events.
Kodi provides easy access to a selection of these add-ons via an official repository that you can access inside the Kodi player itself. However, this is just a small selection of the content that you can use with Kodi, as there’s countless add-ons available on the wider Internet.
In this article, I’m going to show you how to install and setup the Kodi player, and how to download a selection of add-ons that let you stream sports channels from around the world, including channels that show premiership football.
I’ll be showing you how to access and download content from the official Kodi add-on repositories, as well as how to install add-ons that aren’t available through the official repositories. Installing these “unofficial” add-ons is slightly more complicated, but mastering the extra steps required to install these add-ons means that by the end of this article, you’ll know how to install pretty much any Kodi add-on – regardless of whether it’s available through Kodi itself, or whether you’ve found it from some other corner of the web.
How to install Kodi on your Mac
Head over to the official Kodi website and download the most recent version of Kodi for Mac. Once the installer has finished downloading, launch it and follow the onscreen instructions to install Kodi, then launch your new Kodi app.
If your Mac warns you that this file is from an unidentified developer, then open your Mac’s ‘System preferences….’ and navigate to ‘Security & Privacy > General.’ Find the ‘Kodi was blocked….’ warning and click its accompanying ‘Open anyway’ button. You should now be able to launch Kodi without any problems.
Enabling Unknown Sources
Before you can install any add-ons, you’ll need to enable Kodi’s ‘Unknown sources’ option:
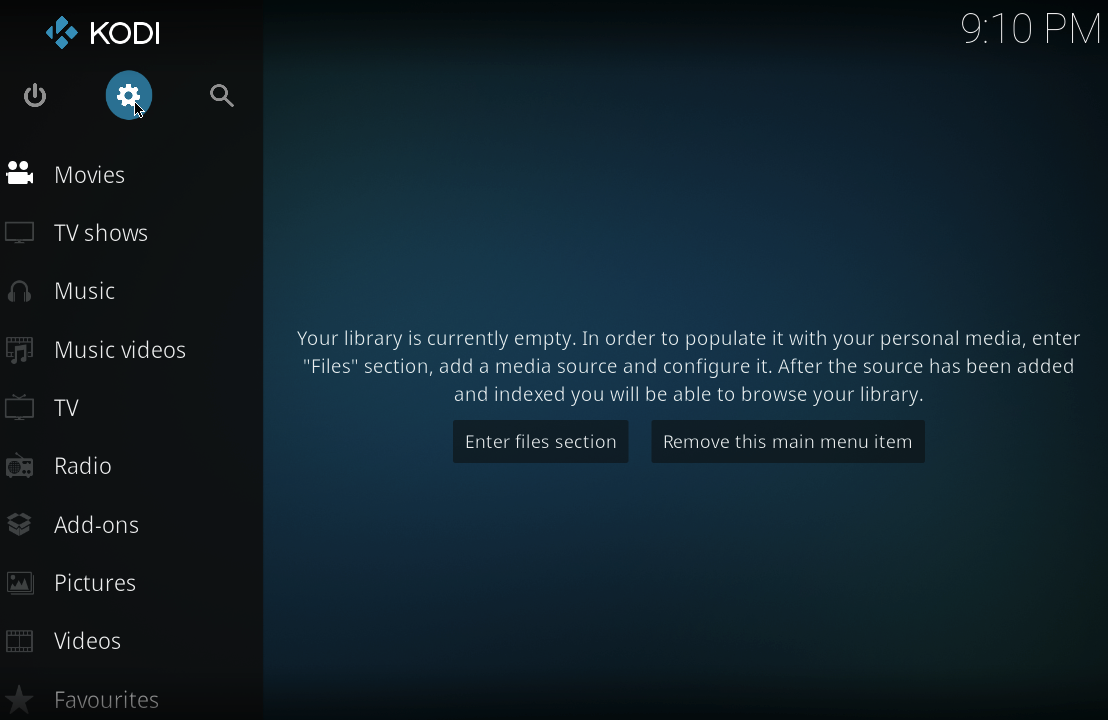
- Click the ‘Settings’ cog icon towards Kodi’s upper-left corner (where the cursor is positioned on the screenshot below).
- Select ‘System settings.’
- Keep clicking the text in the bottom-left of the screen, until this text changes to ‘Expert.’
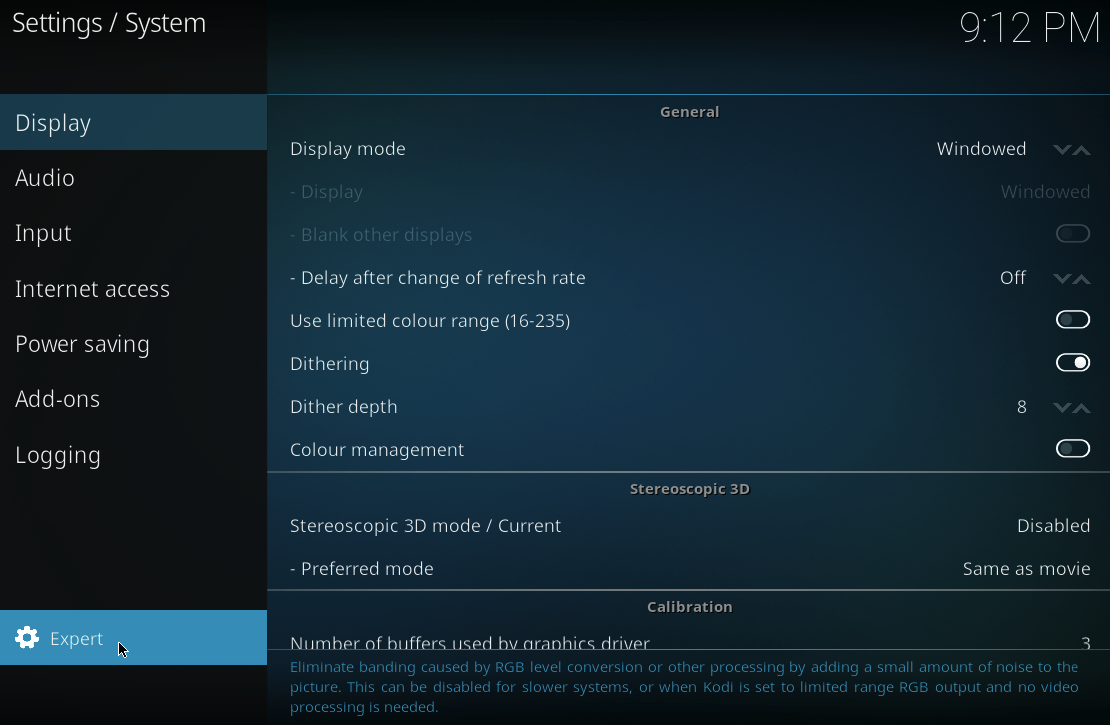
- Select ‘Add-ons’ from the left-hand menu.
- Drag the ‘Unknown Sources’ slider to the ‘On’ position.

- Read the disclaimer, then click ‘Yes’ if you’re happy to proceed.
- Navigate back to the main Kodi screen by pressing the ‘Esc’ key on your keyboard.
Installing Add-Ons
You’re ready to start installing add-ons! Since we want to stream the latest sporting content, I’m going to show you how to install Our Sports, which isn’t included as part of the official Kodi repositories.
When it comes to Our Sports, there’s another catch you need to be aware of: this add-on requires you to have both SportsDevil and F4M Tester installed, so we’ll need to setup both of these add-ons before we can install Our Sports.
Installing SportsDevil
To install SportsDevil:
- On the main Kodi screen, click the ‘Settings’ icon – it’s the one that looks like a cog.
- Select ‘File Manager.’
- Double-click ‘Add source.’

- In the subsequent popup, click the ‘None’ text.
- Type the URL of the repository containing the add-on you want to install. For SportsDevil, that’s http://fusion.tvaddons.ag. Click ‘OK.’
- Enter a name for this media source. To make this repository easy to identify, you’ll typically want to use the name of the repository. For the sake of this tutorial, I’m going to use ‘Fusion.’ Click ‘OK.’

- Return to the main Kodi screen (by repeatedly pressing the ‘Esc’ key) and then select ‘Add-ons’ from the left-hand menu.
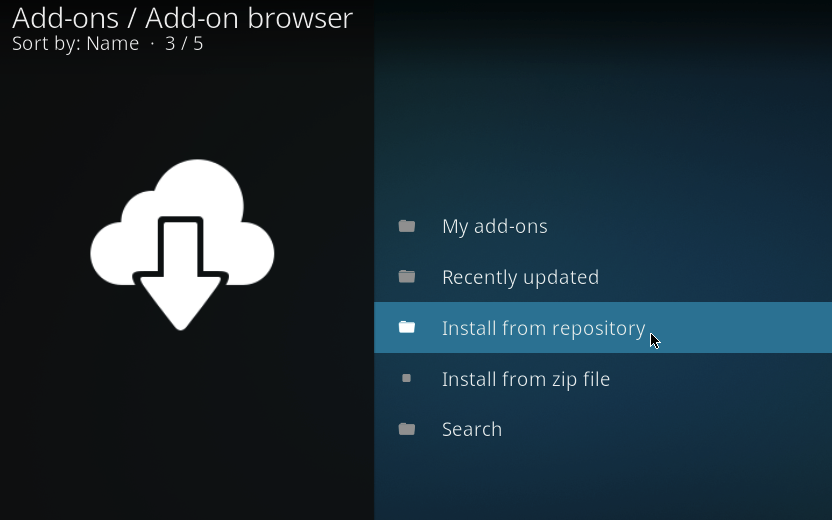
- Click the ’Add-on Package Installer’ icon (where the cursor is positioned in the following screenshot).

- Select ‘Install from zip file.’
- Select fusion/kodi-repos/english/repository.unofficialsportsdevil-x.x.x.zip
- Select ‘Install from repository.’
- Select ‘Unofficial SportsDevil Repository > Video Add-Ons > SportsDevil.’
- Click ‘Install’ and your add-on will be installed.
Unlike Our Sports, SportsDevil can run independently and contains a range of sports channels and content (although the exact content you’ll be able to access may vary depending on your geographical location).
To take a look at what SportsDevil has to offer, navigate back to the main Kodi menu, then select ‘Add-ons > Video add-ons’ followed by your SportsDevil add-on.
Each add-on’s content is arranged differently, but you’ll typically start by selecting categories and then drill down to the channels, TV programmes and films available in each category. If you spot something you want to start watching, then just give it a click.
If you need to backtrack and return to the previous screen, then either click the three-dotted icon towards the top of the screen (if available), or press the ‘Esc’ key on your keyboard.
Installing F4M Tester
The next step is installing F4M Tester, which is used by a number of popular Kodi add-ons, including Our Sports.
You can install this add-on from the http://fusion.tvaddons.ag repository we added to our Kodi installation in the previous section, which makes the process of installing F4M Tester much easier:
To install this add-on:
- Navigate to the main Kodi screen and select ‘Add-ons’ from the left-hand menu.
- Click the ‘Add-on Package Installer’ icon.
- Click ‘Install from ZIP,’ then select Fusion (or whatever you chose to name this repository in the previous section).
- Select ‘Kodi-repo > English > repository.shani-x.x.x.zip.’
- Select ‘Install from repository,’ followed by ‘Shani’s Addon Repository.’
- Select ‘Video add-ons > f4m Tester > Install.’
Installing Our Sports
Once you’ve installed SportsDevil and F4M Tester, it’s finally time to install the Our Sports add-on:
- Navigate back to the main Kodi screen.
- Click the ‘Settings’ cog and select ‘File Manager > Add Source > None.’
- Enter the URL http://thecommunityrepo.netai.net/zip/ then click ‘OK.’
- Give this source a name (I’m using ‘Community Repo’) then click ‘OK.’
- Return to the main Kodi screen and select ‘Adds-ons > Add-on Package installer > Install from ZIP file.’
- Select the Community Repo.
- Click repository.communityrepo-x.x.zip, followed by ‘OK.’
- Select ‘Install from repository’ followed by ‘The Community Repository.’
- Select ‘Video add-ons > Our Sports > Install.’
At this point, you have everything you need to start streaming content through Our Sports, so navigate back to the main Kodi screen and select ‘Add-ons > Video add-ons > Our Sports.’ Spend some time exploring the various channels and programmes that Our Sports has to offer, and if you see anything you want to start watching, then just give it a click!
Installing add-ons from the Kodi repository
Up until now, we’ve focused on downloading and installing Kodi add-ons from other parts of the web, but Kodi also offer a selection of official repositories that you can browse from inside the Kodi interface.
To see what add-ons are available, navigate to the main Kodi screen and then select ‘Add-ons’ followed by ‘Download.’ Spend some time exploring the different categories and the add-ons that are available in each category, to see whether anything catches your eye.

If you do decide that you want to install a particular add-on, then select it from the list and then give its ‘Install’ button a click.

Alternatively, you can browse Kodi’s catalogue of add-ons via your regular web browser, by visiting the official Kodi website.
Troubleshooting Kodi
Regardless of whether you download Kodi add-ons from the wider web, or stick to the ones offered through the official Kodi repository, you may sometimes encounter temperamental behaviour when you’re trying to stream content. Streaming services are notoriously susceptible to changes, as certain content may become blocked or restricted, and content availability can vary depending on your geographical location.
If you do encounter any issues with your Kodi experience, then try the following fixes:
- Check for updates. If your add-an is out of date, then it’s possible that you’re encountering an issue that the developer has already fixed in a subsequent update. To check that you’re running the latest version of all your add-ons, return to the main Kodi screen and then navigate to ‘Add-ons > My add-ons.’ Press the left-arrow key on your keyboard to open a side-menu, and then select ‘Check for Updates.’ Install any updates that are available. If you’ve installed add-ons outside of the official Kodi repositories, then these may need to be manually updated, so it’s always worth checking the repository or website associated with that add-on, just to make sure you really are running the latest version.
- Check that you’re running the latest version of Kodi. You’ll find the latest stable release at the official Kodi website. If you’re unsure what version of Kodi you have installed, select the ‘System’ cog, followed by ‘System information > Summary.’ You’ll find the version number in the bottom-right corner of the screen.
- Clear Cache and Purge Packages. This requires the ‘Indigo’ add-on. Conveniently this add-on is available through the http://fusion.tvaddons.ag repository we’ve already added to our Kodi installation. Assuming you’ve completed the previous steps, you can install ‘Indigo’ by navigating to the main Kodi screen and selecting ‘Add-Ons > Package Installer Icon > Install from ZIP file > Fusion > begin here > plugin.program.indigo-x.x.x.zip > OK.’ Next, select ‘Install from repository > TVADDONS.AG Add-on Repository > Program add-ons > Indigo.’ Once you’ve installed Indigo, launch it and select ‘Maintenance Tools > Clear cache’ followed by ‘Purge packages.’ Finally, close and re-launch Kodi, and check whether clearing and purging your Kodi installation has fixed the problem.

- Consider investing in a VPN. If you’re struggling to load or access content, then it’s possible that this content is geographically-restricted. If you suspect your current location is preventing you from accessing content, then one way around this problem is to use a VPN (Virtual Private Network). A VPN allows you to unlock content that’s restricted in your region, by emulating a different geographical locations. For more information about VPNs, including some recommendations for specific VPNs you may want to try, check out our Best Mac VPNs Compared and Reviewed article.


Add Comment