


Have you ever wanted to try out a completely different operating system?
If you’re curious to see whether the grass really is greener on the other side, then you don’t need to do something drastic like purchase a new computer. You can actually trial many different operating systems (OS) on your Mac, and can even completely replace macOS with the operating system of your choice.
One of the most popular alternatives to macOS, is Linux; a powerful and versatile OS that’s particularly popular with software developers. Since Linux is designed to run on everything from mobile phones upwards, it can also be a great way of breathing new life into an old Mac – even if your Mac is so old that it’s no longer compatible with the latest macOS releases, then it may still be compatible with the latest version of Linux.
In this article I’m going to show you a quick and easy way of experiencing Linux on your Mac, by creating a virtual Linux environment that runs inside your regular macOS. I’ll also show you how to permanently replace macOS with Linux, effectively turning your Mac into a whole new Linux computer.
There’s a few different versions, or “distributions” of Linux available. Throughout this article I’ll be using Ubuntu, as it’s generally seen as the best starting point for new Linux users, but after mastering Ubuntu you may want to move onto more advanced or experimental versions of Linux – some possible alternatives include Linux Mint, Fedora and Debian.
Trialling Linux on your Mac
Since it’s the easiest, and the least scary option, let’s start by using virtualisation software to create a Linux VM that’ll run alongside our existing macOS. This emulated Linux environment will run in its own window, just like any other software program. Inside the window, you’re in the Linux OS, and when you move outside this window you’re in the regular macOS – it’s as easy as that! This setup gives you a taste of the Linux experience, without requiring you to do anything drastic such as wiping macOS from your machine (something that isn’t easy to reverse).
Since the two operating systems exist side by side, you also have the freedom to switch between the two whenever you like, so you get the best of both worlds.
To create a Linux VM, you’ll need some virtualisation software. For this tutorial, I’m going to use VirtualBox, which you can download for free from the VirtualBox website.
You’ll also need a version of the Linux operating system, which takes the form of an .ISO file, so head over to Ubuntu’s website and download the latest, stable version. Although you can download Ubuntu for free, you should consider making a donation to help support the work being done by the Ubuntu team.
Now, you’re ready to create your VM:
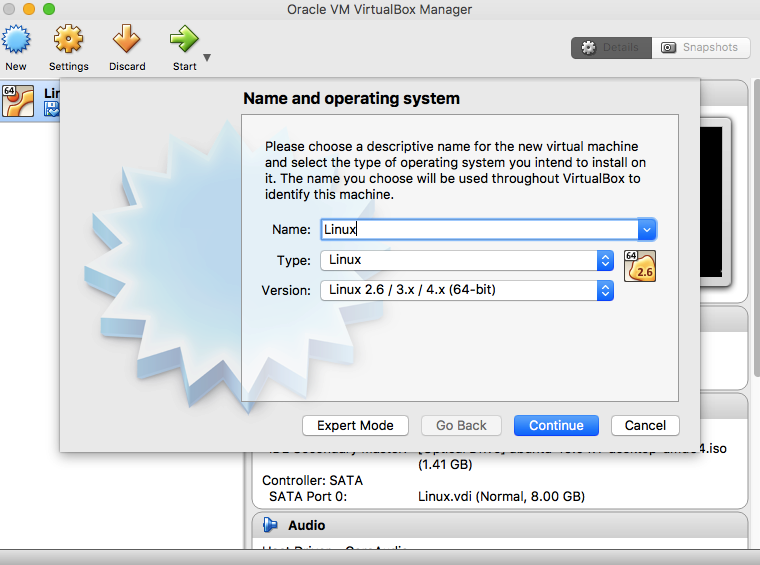
- Launch VirtualBox and select the ‘New’ button in its upper-left corner.
- Give your ‘virtual machine’ a descriptive name – typically, this will be the name of the operating system you’re emulating. Set the ‘Type’ to ‘Linux’ and ‘Version’ to ‘Ubuntu (64 bit).’ Click ‘Continue.’
- Now it’s time to decide how much RAM you’re going to allocate your VM. As a minimum you should give Ubuntu 1GB of RAM, but you’ll generally want to allocate as much RAM as possible. Click ‘Continue.’
- Select the ‘Create a virtual hard drive now’ radio button, then click ‘Create.’
- In the window that appears, select ‘VDI (VirtualBox Disk Image)’ and click ‘Continue.’
- Next, you need to specify the type of Hard Disk Storage you want to create: ‘Fixed Size’ or ‘Dynamically allocated.’ If you select ‘Fixed Size,’ all of the RAM assigned to this drive will be allocated instantly. However, if you select ‘Dynamically allocated’ the VM will only use as much RAM as it needs, so if you allocate your VM a dynamically expanding storage of 50GB, the virtual machine will use whatever space it needs up to that 50GB maximum. Unless you have a very good reason not to, you’ll generally want to opt for ‘Dynamically allocated.’ Click ‘Continue.’
- Give the ‘VirtualBox Disk Image’ a descriptive name.
- Use the slider to determine the size of the hard drive you want to create. If you selected ‘Dynamically allocated,’ then bear in mind that VirtualBox won’t necessarily use all of this space. Make your selection, then click ‘Create.’
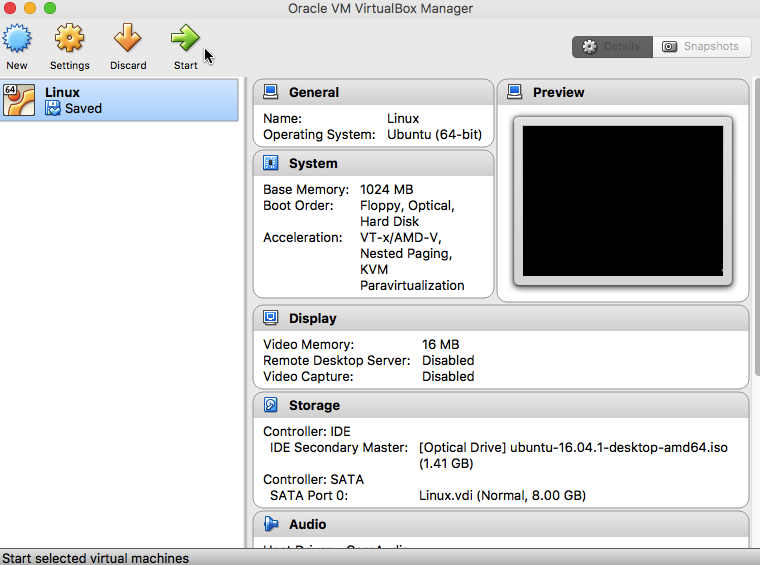
- You’ll now see a summary of all the settings you’ve created for this VM. Review this information, then if you’re happy to continue, click ‘Start.’
- At this point, you can select the .ISO file you downloaded earlier. Click the little folder icon, select your .ISO, click ‘Open’ and then click ‘Start.’
- Ubuntu will now boot and display a few messages explaining how your keyboard and mouse will function within the VM environment. Make sure you read this information carefully.
- At this point, you have a choice: either ‘Install Ubuntu’ or ‘Try Ubuntu.’ If you just want to quickly give Ubuntu a go, then you may want to opt for ‘Try Ubuntu,’ however most of the time you’ll want to install Ubuntu, so give ‘Install Ubuntu’ a click. Note, this won’t wipe macOS or any of your data.
- Ubuntu will run some tests to ensure your computer is compatible. Assuming your Mac passes these tests, the next step is to select both ‘Download updates while installing’ and ‘Install this third party software’ checkboxes, then click ‘Continue.’
- Select ‘Erase disk and install Ubuntu’.
- Click ‘Install Now,’ followed by ‘Continue.’
- Select your timezone, your keyboard layout and language, and create a username and password.
- Wait while Ubuntu is installed – this may take a while!
- When Ubuntu has finished installing, click ‘Restart Now.’
And that’s it! Your virtual machine will now boot into Ubuntu. Enter the username and password you created earlier, and you’re ready to start exploring your new VM.
Replace macOS with Linux
If you want something more permanent, then it is possible to replace macOS with the Linux operating system. This isn’t something you should do lightly, as you’ll lose your entire macOS installation in the process, including the Recovery Partition. If you change your mind, it is possible to restore macOS without a Recovery Partition, but it’s far from straightforward!
If you’re certain that you want to replace macOS with Linux, then you’ll need a USB flash drive. In this tutorial, I’ll be using the Etcher image writing app to create a bootable USB stick for Ubuntu, so download this app from the Etcher website.
Once you’ve installed Etcher, you’re ready to turn your Mac into a Linux machine:
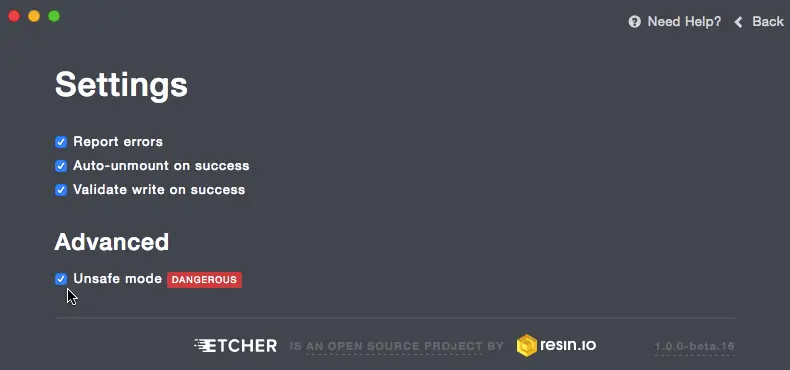
- Open Etcher and click the ‘Settings’ cog icon in its upper-right corner.
- Select ‘Unsafe Mode.’
- Read the disclaimer. If you’re happy to proceed, then click ‘Yes, continue.’
- Select ‘Back’ in the upper-right corner.
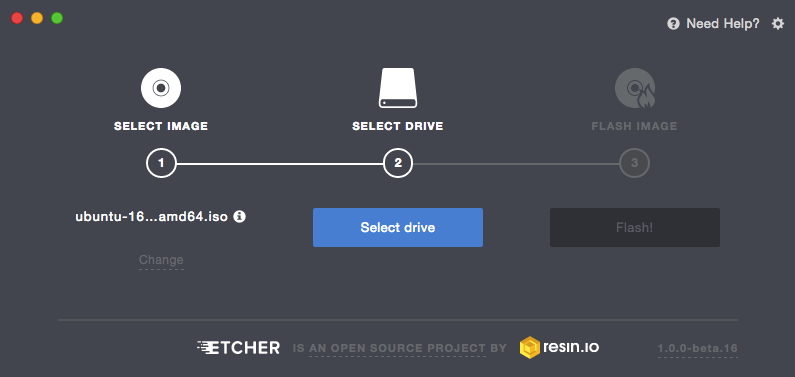
- Click the ‘System Image’ button and select the Ubuntu .ISO file you downloaded earlier.
- Insert your USB flash drive.
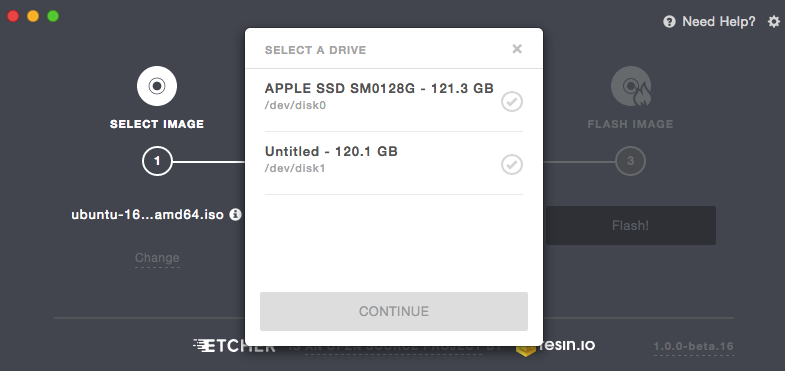
- Click Etcher’s ‘System drive’ button and select your USB drive. Whatever you do, don’t select /dev/disk0 as that’s your Mac’s hard drive, and you definitely don’t want to wipe that! Click ‘Continue.’
- Click the ‘Flash’ button and wait while the .ISO file is copied to your USB stick.
- Remove the USB flash drive from your Mac.
- Shut down your Mac.
- Attach your USB stick to your Mac.
- You now need to boot into your Mac’s Startup Manager, so power up your machine while holding the ‘Option’ key.
- Select ‘EFI Boot’ and press ‘Return.’
- Ignore the ‘Try Ubuntu’ and ‘Install Ubuntu’ options for now, and instead press ‘e’ to edit the boot entry. Edit the line that begins with “Linux” so you end up with the following command:
file=/cdrom/preseed/ubuntu.seed boot=casper quiet splash nomodeset —
- Press F10.
- Next, double-click ‘Install Ubuntu.’
- Choose your language, and click ‘Continue.’
- Select ‘Install this third-party software.’ Click ‘Continue.’
- Select ‘Yes’ in response to the /dev/sdb alert.
- Select ‘Erase disk and install Ubuntu.’ Click Continue.
- Double-check that ‘Select Drive’ is set to your main hard drive, then click ‘Install Now,’ followed by ‘Continue.’
- Select your location, your keyboard layout, and enter the username and password you want to use. Click ‘Continue’ and that’s it – Linux will be installed!
Once installation is complete, log in using the username and password you created earlier, and you’re ready to start exploring your brand new Linux OS!
Before you go
After spending over 20 years working with Macs, both old and new, theres a tool I think would be useful to every Mac owner who is experiencing performance issues.
CleanMyMac is highest rated all-round cleaning app for the Mac, it can quickly diagnose and solve a whole plethora of common (but sometimes tedious to fix) issues at the click of a button. It also just happens to resolve many of the issues covered in the speed up section of this site, so Download CleanMyMac to get your Mac back up to speed today.


Why? Why replace a UNIX with Linux? What do you gain? You’ve swapped launchd and plists for systemd and swapped CoreStorage (on top of HFS+) for ext or XFS and you downgraded the GUI.
If you want to update the installed software, then try MacPorts or Homebrew… this is just you having too much time.