


What are Annotations?
Mail in OS X Yosemite has several new features that users will find to be welcome improvements. For example, Mail Drop allows you to attach large files up to several Gigabytes in size.
But perhaps the most fun addition is called Annotations (sometimes referred to as Markup), because it lets you edit images inline in your mail message without having to use an external editor. You can even add a custom signature using the trackpad or camera. The cool thing about Annotations is that if you draw a freehand sketch (such as an arrow), Mail will do its best to convert that into one of its preset shapes.
This guide provides a step-by-step how to guide to Annotations, so that you’ll be up and running in no time creating super pictures that make all your messages look that much more attractive.
How to use Annotations
Step 1 – Launch Mail
The first thing to do is to launch Mail in the normal way. Most people keep the Mail icon in their Dock, so just click it or type Mail into Spotlight if you’re already in another fullscreen application for instance.
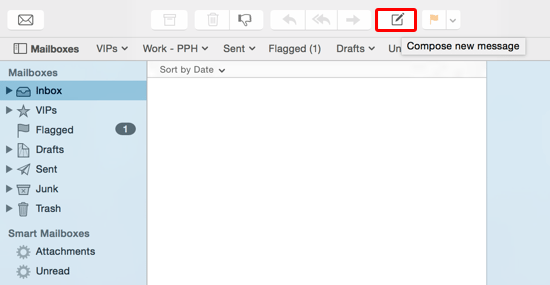
Step 2 – Compose a new message
To create a new message, click the Compose new message button on the right of Mail’s menu bar. This will open a new window ready for editing.
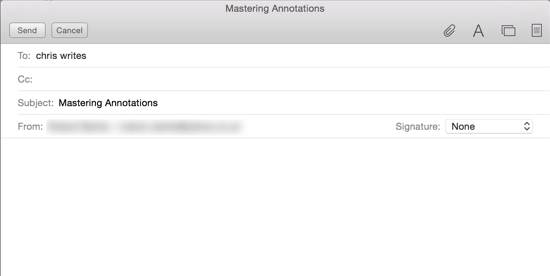
Step 3 – Populate the mail fields
Next up, complete the usual mail fields as normal – for example the To field, Subject and any Signature.
Step 4 – Attach an image
To use Annotations, you need to attach an image (as otherwise there is nothing to annotate!).
You can do this via the paperclip icon in the message’s toolbar, or with the photo browser. In this case, I used the photo browser to find a picture on my Mac.

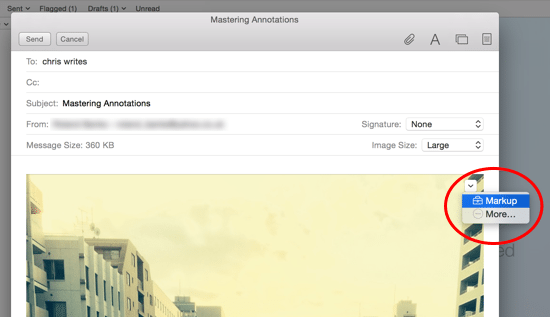
Step 5 – Enter markup mode
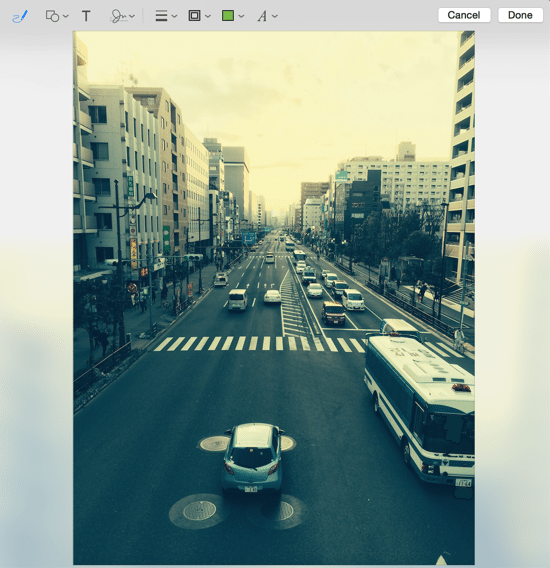
Once the chosen picture is visible in your message, hover your mouse on the picture to show a small dropdown menu. There are two options – Markup and More. The More button takes you to System Preferences to configure extensions (which we may cover in another post), so in this case just choose Markup.
Step 6 – Check out the markup menu
Once you’ve entered annotate / markup mode, your picture will appear in a new window with a toolbar as below:
The toolbar contains the following items left to right:
- Sketch – draw any shape
- Shapes – insert one of the preset shapes
- Text – add text to your picture
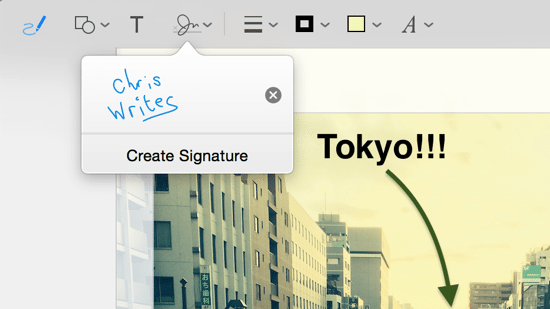
- Sign – add a custom signature
- Shape Style – set the line style
- Border Colour – set the line colour
- Fill Colour – set the fill colour
- Text Style – format your text
- Cancel – return to mail
- Done – insert into your final message

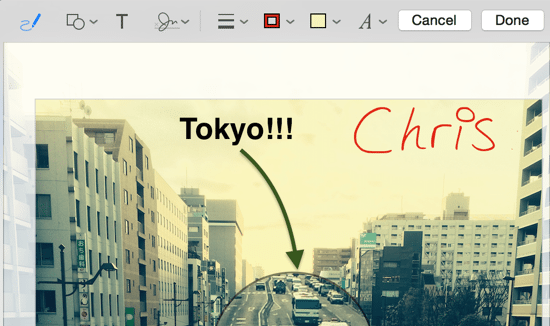
Step 7 – Sketch a shape
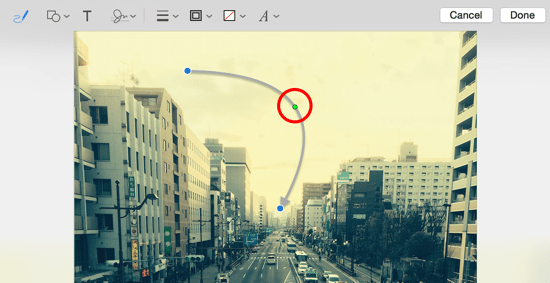
Using the first icon on the toolbar (blue in the screenshots), draw any old shape on your picture. For the purposes of this tutorial, we’ll draw a very rough arrow shape.
You’ll notice a popup menu appear on the left with two options – the first keeps your original sketch the way you drew it, and the second converts it to one of the preset shapes (if any match).
In this example we’ve kept the original sketch, but notice the blue circles – you can use these to resize the shape, or just grab anywhere on it to move it around.
If you choose the second option from the popup, your shape will revert to Mail’s suggested preset:
Tip: try sketching lots of different shapes such as squares, circles and arrows, and see what Mail does to them!
Note the green dot which appears in the centre of the arrow below – you can use this to change its curvature in any way desired. Most objects have similar controls – it’s just a case of experimenting with each one to see what they do.
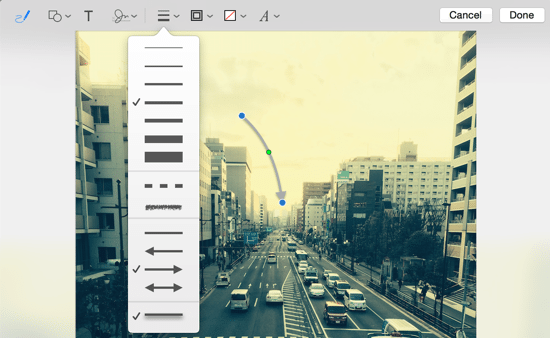
Step 8 – Change your shape style
The next thing you might like to do is to change the thickness or line style of your shape. For example a thick or a dotted line.
The Shape Style menu has lots of options:
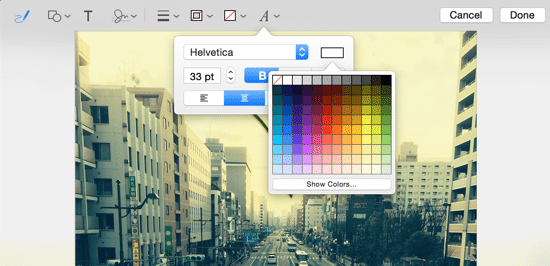
Step 9 – Choose a colour
You can set the border and fill colour for any shape. For arrows, there’s only a border colour but others (such as squares and circles) allow you to set a fill colour using the standard OS X pickers.
Note that the Text Style icon can be used to set the style of text objects and to any text contained within shapes.
Step 10 – Create some more shapes
Our picture looks a little sparse so we’ll create another shape – this time we’ll choose a speech bubble.
Use the Shapes menu to add the shape, then the T button to also add a text object (“Tokyo!!!”).
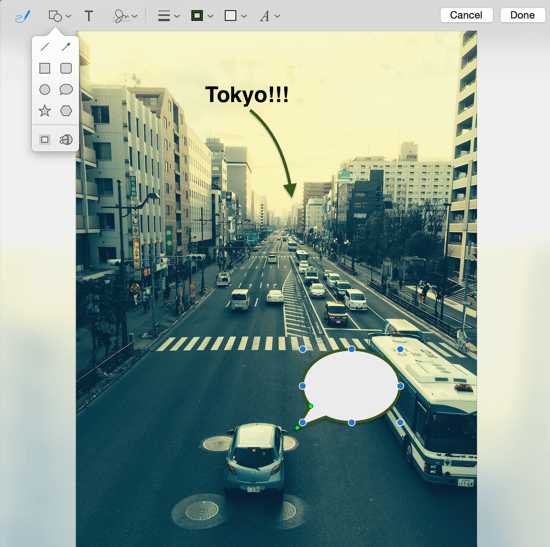
In the screenshot above, the speech bubble has two green dots – one of them changes the length of the callout and the other changes the width.
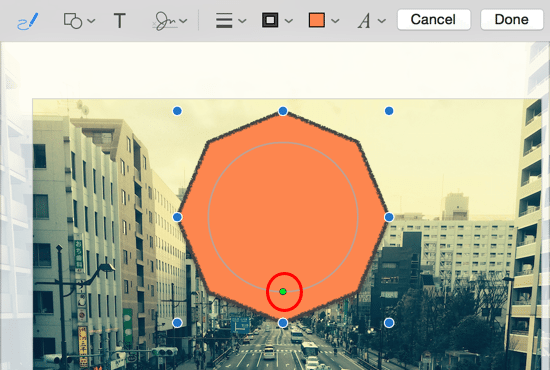
If you want to add shapes with lots of sides, choose the 6-sided Hexagon icon in the shapes menu. This creates a shape but allows you to adjust how many sides it has by moving the green circle. For example, you can easily create a triangle, square, or shapes with many more sides.
Tip: create lots of different shapes and play around with their blue and green grab handles!
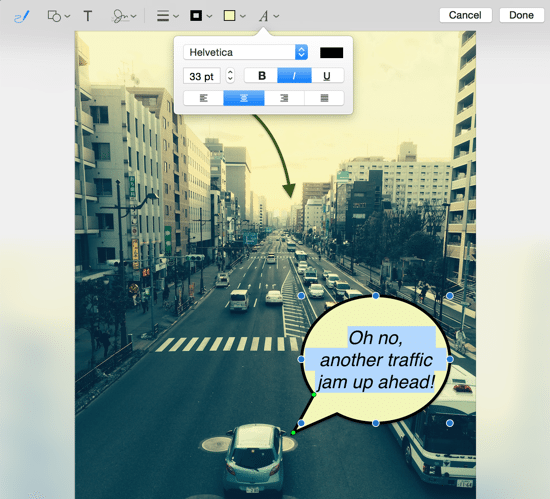
Step 10 – Add text to your shapes
To add some text to the speech bubble, left-click anywhere on the object and type a few words. They will appear in the currently selected style, but you easily change that using the Text Style menu.
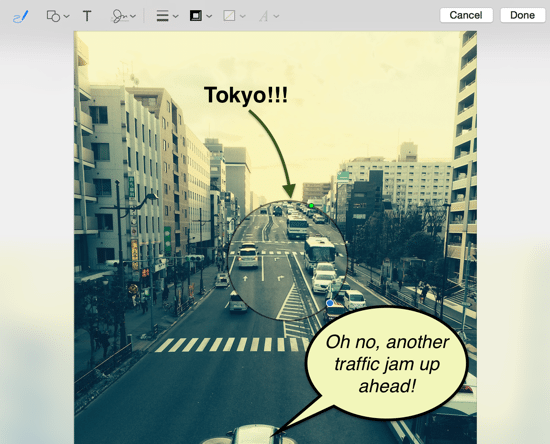
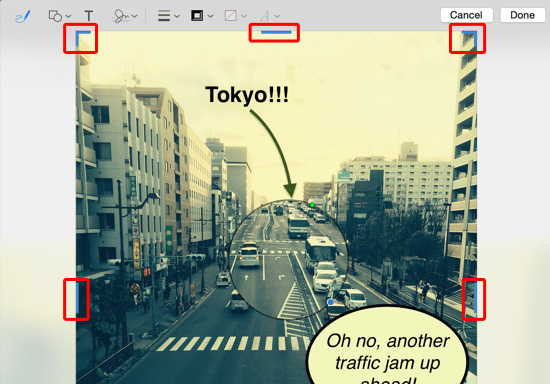
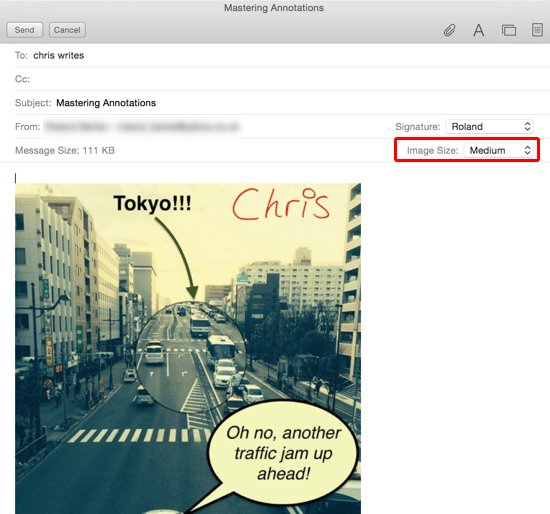
Step 11 – Add a circular “zoom” object
One of the items in the Shapes menu is a cool circle that zooms into the picture behind it.
You can also make the shape larger (with the blue dot) or increase/decrease the zoom using the green dot:
Step 12 – Crop your picture
Besides adding all manner of fun shapes, you can also crop your image to remove any unwanted portions. Select the Crop icon from the shapes menu (the item on the lower left).
Small blue grab handles appear on each side of the image – just move these in or out as desired to crop.
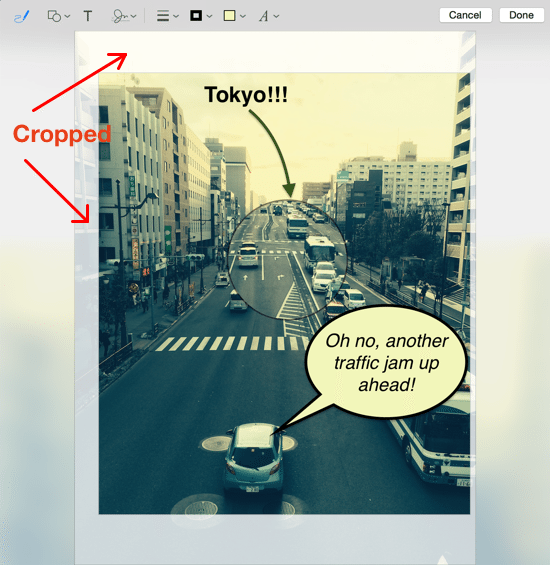
Once it’s cropped, you’ll notice the unwanted area is still visible but slightly faded (only while editing – it won’t appear in your final email).
Step 13 – Add a custom signature
Perhaps the best feature in Annotations is the ability to insert a custom signature. This can be done with the trackpad or your Mac’s camera.
Select the Sign button on the toolbar and then hit Click Here to Begin.
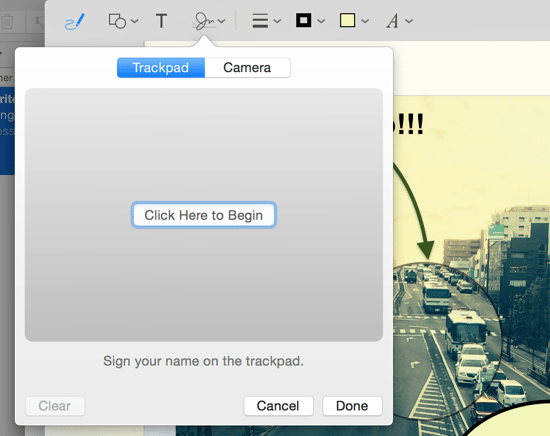
Now you can doodle all over your trackpad and the result is mapped to the shape onscreen.
It’s important to realise that your trackpad matches exactly the virtual trackpad shown. This means that its actually easier to just look down at your physical one to sign your name. It might take you a few attempts, but the results can look pretty good!
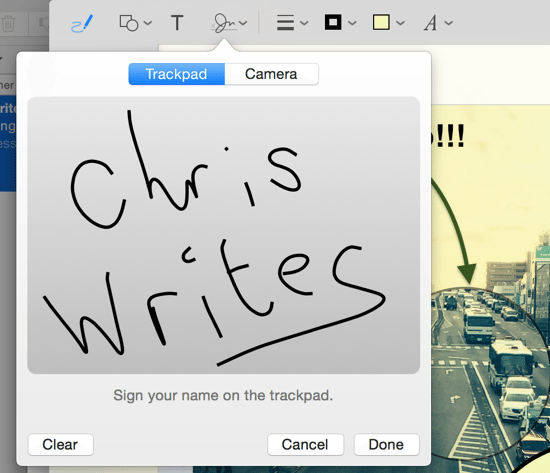
Once you have created your signature just press any key.
You then have the option to clear and start again, to cancel, or to accept the one you’ve just made. If you’re happy with the result, choose Done.
Now select the Sign menu again and you will see your new signature ready to select – click to insert into your picture.
Once your signature is inserted you can resize it, move it around or change its style – in this example I’ve just made it yellow to match the picture.
Next, repeat the process using your Mac’s camera. This requires you to hold up your signature on a piece of white paper
It can take your Mac a few seconds to recognise the text, and the results seem to depend on the lighting and colour of pen used.
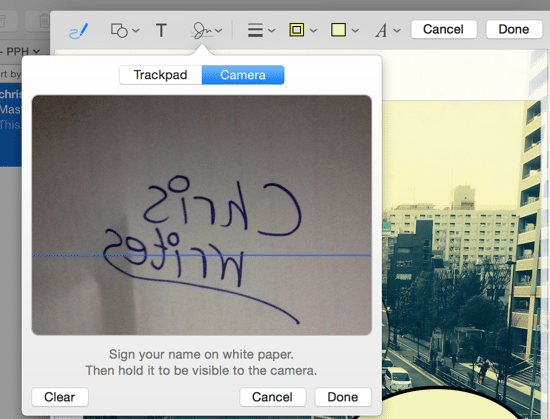
As you can see below, I’ve just gone with “Chris” in the end – mainly because the camera would only pick up part of the signature. Unfortunately, it’s not obvious what the blue line across the centre of the capture area does – my results seemed a little sporadic, probably due to the poor lighting…
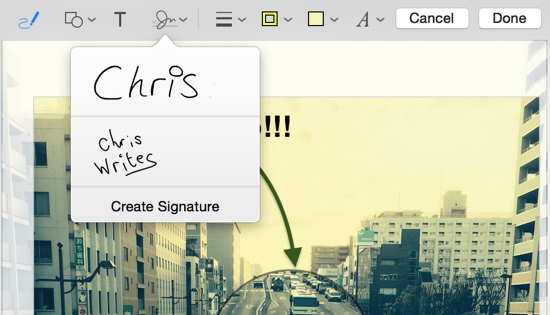
Once you have created a camera-based signature, select it from the Sign menu to add to your picture.
It’s also worth noting at this point that if you want to change the order of any objects (i.e. in front or behind each other), right-click a shape and choose the relevant option (such as send to back).
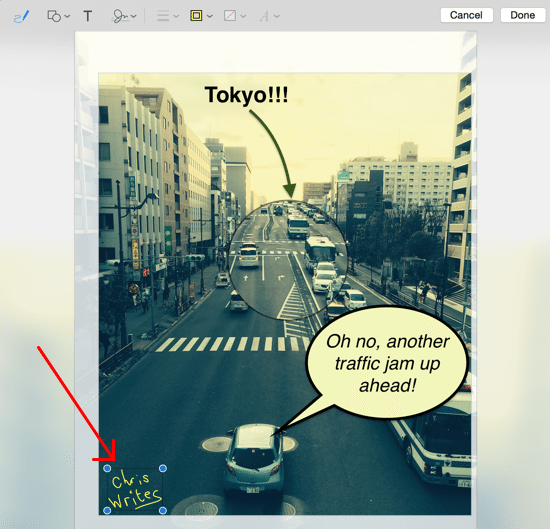
Here is my completed picture with my desired text inserted inserted. I’ve also coloured it red, just to make it stand out a bit.
Step 14 – You’re done!
When you are happy with your all-singing, all-dancing image, click Done to return to Mail.
If you want to save a draft and continue editing later, choose Cancel and then Save.
Here’s my final annotated image.
Annotations is a great addition to Mail, with lots of useful features that will get even better over time.
I’m looking forward to scribbling on all my email pictures in future. Happy annotating!
Before you go
After spending over 20 years working with Macs, both old and new, theres a tool I think would be useful to every Mac owner who is experiencing performance issues.
CleanMyMac is highest rated all-round cleaning app for the Mac, it can quickly diagnose and solve a whole plethora of common (but sometimes tedious to fix) issues at the click of a button. It also just happens to resolve many of the issues covered in the speed up section of this site, so Download CleanMyMac to get your Mac back up to speed today.


Add Comment