


Content Caching is one of the major new features introduced in High Sierra.
If you have multiple Apple devices, then this new macOS service can reduce the amount of bandwidth and time it takes to download software distributed by Apple.
In this article, we’re going to look at what High Sierra’s content caching is, how it works, and how you can start using it.
What is content caching?
Once you’ve enabled content caching, every time you download supported software or data, your Mac will store this content locally. At this point, the software or data will be available for other local Macs, iOS devices and Apple TVs (known as “clients”) to access and use, so they don’t have to re-download their own version of this content from the Internet.
For example, when the first client on your network downloads a new version of macOS, it’ll cache this content, and any other Macs on this network will then be able to copy this update from the cache. Since you’re not downloading the same content multiple times, content caching can speed up the process of updating all subsequent devices, while also reducing how much bandwidth you use, which is good news if you have a capped Internet connection!
The benefits of content caching increase based on the number of Apple devices that are on your network, which makes content caching ideally suited to environments such as offices and schools, however it may also come in handy if you’re a huge Apple fan who simply owns a lot of Apple products!
High Sierra can cache all the following software and data:
- macOS updates.
- App Store applications, and their updates.
- iCloud data, such as photos and documents.
- iTunes 11.0.4 and later.
- iTunes U course materials.
- iBooks content.
- GarageBand content.
- iOS app purchases and “over the air” updates (any iOS updates downloaded from iTunes are not cached).
- Apple TV apps and updates (over the air).
- Some mobile assets, such as Siri voices and language dictionaries.
Just be aware that content caching can impact the speed of your Wi-Fi network, so wherever possible you should setup content caching on a Mac that has a wired Ethernet connection.
Setup content caching
To setup content caching on macOS High Sierra:
- Select the ‘Apple’ icon from the Mac menu bar.
- Select ‘System Preferences… > Sharing.’
- In the left-hand menu, select the ‘Content caching’ checkbox.
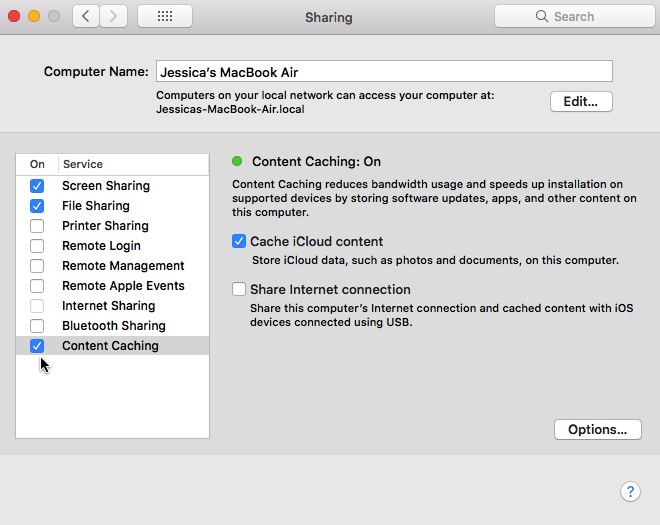
- Click the ‘Option…’ button.
- Use the ‘Cache Size’ slider to select the amount of disk space that you want to use for content caching. When the cache reaches this limit, High Sierra will make room for new content by deleting any content that hasn’t recently been used. Your cache size should be large enough to ensure all devices on your network have the chance to use the cached content before it gets deleted. By default, cached content is stored in your boot volume, but if multiple disks are available then you can switch between them using the ‘Edit’ button (note that this button only appears when multiple disks are connected to your Mac).
- Click ‘OK.’
There’s also some additional options that you may want to enable:
- Cache iCloud content. Cache iCloud data, such as photos and documents.
- Share Internet content. Share your cached content with any iPhones and iPads that you connect to your Mac via USB.
Advanced Options
To configure some additional options for your content cache:
- Navigate back to the main ‘System preferences… > Sharing’ screen.
- Make sure ‘Content Caching’ is selected in the left-hand menu.
- Press and hold the ‘Option’ key on your keyboard, which transforms the ‘Option’ button into an ‘Advanced Options…’ button; give this button a click.
This gives you access to some additional tabs:
- Clients. By default, any devices that are using the same local network will be able to access your Mac’s content cache. Alternatively, this tab lets you specify the devices that can connect to your Mac.
- Peers. This is where you specify the IP ranges that’ll have access to your Mac’s cache.
- Parents. You can use this tab to create a hierarchy of caching servers, by specifying the IP addresses of any parent servers that you want to use, plus the policy that should govern these servers, such as Round Robin or First Available.


Add Comment