


You may be familiar with using tethering to transform your iPhone into a Wi-Fi hotspot, but did you know that you can turn your Mac into a Wi-Fi hotspot?
On the surface, this may not seem as useful as sharing your iPhone’s cellular data, but there are some situations where you may want to share your Mac’s Wi-Fi with other devices.
Perhaps you’ve purchased an Internet package at a hotel, only to later realise that there’s a single ethernet port – how are you going to survive, when you have a Mac, iPhone and an iPad that all need to be online 24/7? Or, perhaps you’re having a party at your house and don’t particularly want to make your Wi-Fi password public knowledge.
In this article, I’ll show you how to transform your Mac into a portable Wi-Fi hotspot, so you can share its connection with any Wi-Fi enabled device.
Turn your Mac into a hotspot
Imagine you’ve booked a nice, relaxing lodge break for your entire family, confident that the place offers free, unlimited Wi-Fi. Imagine your disappointment when you arrive, only to discover that this “free, unlimited Internet” is actually a single ethernet socket.
Don’t panic: you can connect your Mac to this single ethernet port, and then turn it into a Wi-Fi hotspot that everyone in your family can enjoy:
- Connect your Mac to the ethernet port, using the correct cable.
- Select the “Apple” logo in your Mac’s menu bar.
- Navigate to “System Preferences… > Sharing.”
- In the left-hand menu, select “Internet sharing.”
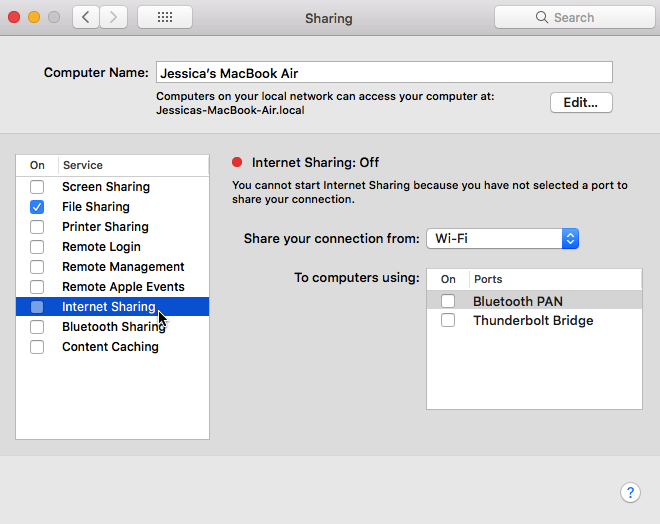
- Open the “Share your connection from” dropdown, and choose “Ethernet.”
- In the “To computers using” box, select “Wi-Fi.”
- Select the “Wi-Fi Options….” button.
- You should now set a password so that the people in the neighbouring lodge can’t hijack your Wi-Fi network. Open the “Security” dropdown and choose “WPA2 Personal.”
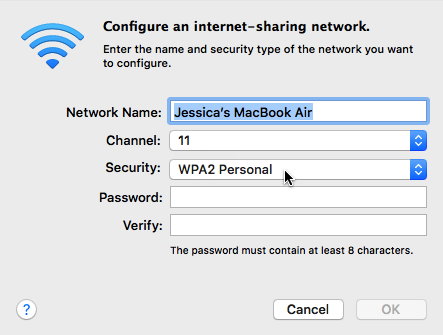
- In the “Password” field, enter the password you want to use, and then repeat this password in the “Verify” field.
- Once you’re happy with the information you’ve entered, click “OK.”
- In the left-hand menu, find “Internet Sharing” and select its accompanying checkbox.
- Read the onscreen information, and if you’re happy to proceed, then click “Start.”
You’ve now successfully turned your Mac into a Wi-Fi hotspot! If you take a look at your Mac’s menu bar, you should see that the regular Wi-Fi icon has been replaced by a little arrow icon, which indicates that you’re sharing your Wi-Fi connection.
Connect to your new Wi-Fi hotspot
You can now connect to this hotspot, in exactly the same way you’d connect to any Wi-Fi network. For example, if you wanted to connect your iPhone or iPad, you’d need to:
- Launch the “Settings” application on your mobile device.
- Select “Wi-Fi” and then choose your mobile hotspot.
- Enter the password you created in the previous section.
After a few moments, your iPhone or iPad should be online! Rinse and repeat for every device that you want to connect to this hotspot.
What if I can’t connect to ethernet?
Let’s return to our lodge scenario. Imagine you have every intention of connecting your Mac to the ethernet socket and using it as a personal hotspot – then you realise that you forgot to pack your ethernet cable!
The bad news, is that by default your Mac can only connect to a Wi-Fi network or host its own network, so you cannot connect to a Wi-Fi network and then rebroadcast this signal as a Wi-Fi network. One potential workaround, is to purchase a Wi-Fi network adapter which enables one network interface to receive a Wi-Fi connection and the other to rebroadcast it.
Alternatively, you can share a Wi-Fi connection with other devices over a Bluetooth Personal Area Network. The resulting connection will be slower than sharing the ethernet connection over Wi-Fi, but it doesn’t require you to purchase any specialist adapters.
To share a Wi-Fi connection over Bluetooth:
- Navigate to “System Preferences… > Sharing.”
- In the left-hand menu, select “Internet sharing.”
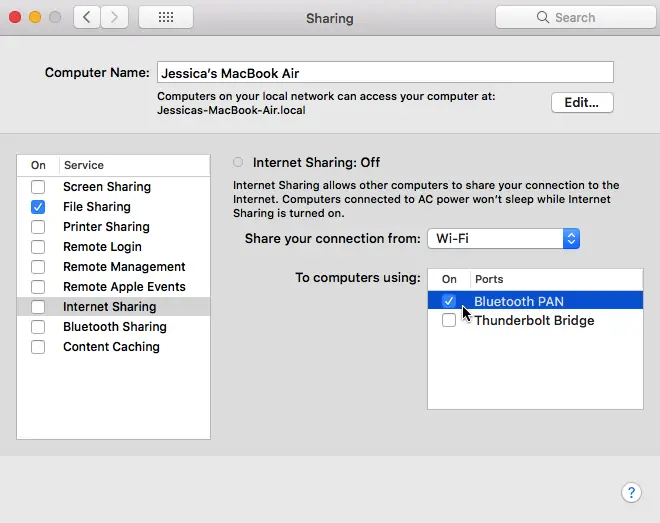
- Open the “Share your connection from” dropdown, and choose “Wi-Fi.”
- In the “To computers using” box, select “Bluetooth PAN.”
- Select the “Wi-Fi Options….” button, and then create your password.
- Once you’re happy with the information you’ve entered, click “OK.”
- In the left-hand menu, find “Internet Sharing” and select its accompanying checkbox.
- Read the warning, and then click “Start” if you’re happy to proceed.
Connect to a hotspot over Bluetooth
To connect to a Wi-Fi hotspot over Bluetooth, you’ll need to enable the Personal Hotspot feature. Let’s assume you’re connecting your iPad or iPhone, to your Mac:
- Launch your iPad or iPhone’s “Settings” app.
- Select “Bluetooth” and enable the device’s Bluetooth connection, if it isn’t already active.
- Navigate to “Settings > Mobile Data” and enable your “Personal Hotspot.”
Next, you need to pair the two devices:
- On your Mac, navigate to “System Preferences… > Bluetooth.”
- If your Mac’s Bluetooth connection isn’t already enabled, select “Turn Bluetooth On.”
- Find your iPhone or iPad in the “Devices” list, and then select its accompanying “Pair” button.
- A code should now appear on both devices; type this code into your Mac, to link the two devices.
Once you’ve successfully paired both devices, you’re ready to connect to your hotspot:
- On your iPhone or iPad, launch the “Settings” application.
- Select “Wi-Fi” and then find the Mac that you want to connect to. Tap “Join.”
- Enter your Wi-Fi password, when prompted. After a few moments, your iPhone or iPad should have unlimited Internet access!


Add Comment