


Creating regular Time Machine backups is essential for ensuring you never lose access to your important files and data.
Previously, we’ve covered how to create a Time Machine backup, how to check that your backups aren’t corrupted, and even how to use your Mac as a networked Time Machine drive, but what should you do if the worst happens, and you need to restore one of your backups?
In this article, I’ll walk you through the process of restoring a Time Machine backup, including some workarounds you can try if you discover that Recovery Mode isn’t working, or that all of your backups have become corrupted.
Booting into Recovery Mode
Most of the time, you’ll restore a Time Machine backup by booting into Recovery Mode. This involves shutting down your Mac, and then restarting it while holding down the ‘Command+R’ buttons. When you see the Apple logo, release these buttons and your Mac should successfully boot into Recovery.
However, under certain circumstances the standard ‘Command+R’ shortcut may not work, for example maybe your recovery partition is corrupt, or you’re experiencing total hard drive failure. If Recovery Mode is unreachable, then you can boot into Internet Recovery instead, which is a version of macOS’ Recovery Mode that’s available to all Mac users who have an active internet connection.
To boot into Internet Recovery, shut down your Mac, and restart it while holding down the ‘Option+Command+R’ keyboard shortcut. Once your Mac boots, you should see a spinning globe, followed by the standard macOS Utilities window. From here, you’ll have access to all the usual Recovery Mode options, including restoring a Time Machine backup.
Restore your Time Machine Backup
Once you’re in Recovery or Internet Recovery, you’re ready to restore your Time Machine backup:
- Select ‘Restore From Time Machine Backup.’
- Read the warning, and if you’re happy to proceed then click ‘Continue.’
- Select the drive containing the Time Machine backup that you want to restore. If the backup is stored on an external disk, then you’ll need to attach the disk to your Mac, if you haven’t already. If your Time Machine backup is stored on a network drive, then make sure you’re connected to the network before proceeding.
- Select the backup that you want to restore, which will typically be your most recent backup.
- Click ‘Continue’ to begin the restoration process. This may take a while, depending on factors such as the size of your backup, your Mac’s specifications, and the speed of your Internet connection, if you’re restoring from a network drive.
Has your Time Machine backup failed? Try the Migration Assistant!
It’s possible for Time Machine backups to become corrupt, or encounter other errors. If you cannot restore any of your backups, then one workaround is to install a fresh copy of macOS, and then use the Migration Assistant to transfer the files and data from your most recent Time Machine backup.
To reinstall a fresh copy of macOS, boot into Recovery Mode using the ‘Command+R’ shortcut, and then select ‘Reinstall macOS.’ The installation process can take a while, but eventually your Mac will restart and you’ll be guided through the standard setup procedure, including creating a new user account and admin password.
During the setup process, you’ll be asked whether you want to use the Migration Assistant. You can then use the Assistant to transfer the files and data from your Time Machine backup, to your fresh macOS installation. Alternatively, you can launch Migration Assistant at any time, by opening a new Finder window and navigating to ‘Applications > Utilities > Migration Assistant.’
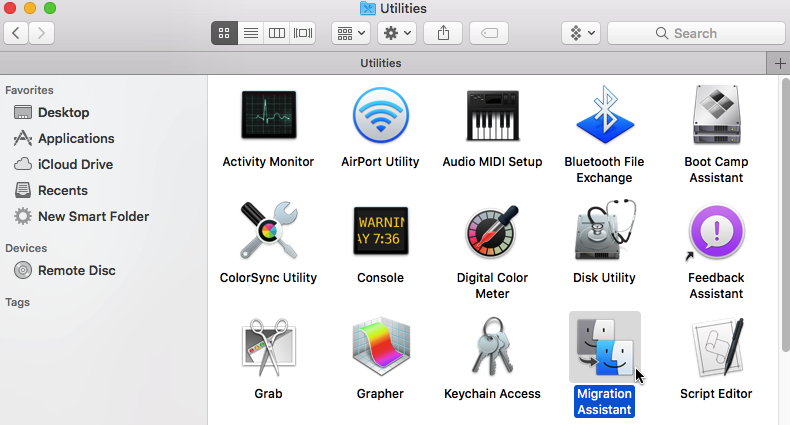
Once Migration Assistant has launched, select the following checkbox: ‘From a Mac, Time Machine backup, or startup disk,’ and then click ‘Continue.’ Finally, select the device that you want to restore from, and follow the onscreen instructions to complete the migration.
Before you go
After spending over 20 years working with Macs, both old and new, theres a tool I think would be useful to every Mac owner who is experiencing performance issues.
CleanMyMac is highest rated all-round cleaning app for the Mac, it can quickly diagnose and solve a whole plethora of common (but sometimes tedious to fix) issues at the click of a button. It also just happens to resolve many of the issues covered in the speed up section of this site, so Download CleanMyMac to get your Mac back up to speed today.


Add Comment