


Ever pressed “Delete” and immediately regretted it?
Don’t panic! In this article, I’ll show you how to recover any file, even if you’ve completely removed that file from the Trash and you never got around to creating a Time Machine backup.
I’ll also be showing you how to recover an earlier version of a file – perfect for those occasions where you get carried away editing, only to then realise you’ve made a terrible mistake and need to rewind the clock!
Recovering deleted files
Have you accidentally deleted an important PDF, Pages document, spreadsheet, or other file? There’s several ways that you can restore a deleted file.
Check the Trash
Let’s get the easy fix out of the way first! If you’ve just deleted the file in question, then chances are it’s still hanging around in your Mac’s Trash.
To rescue a file from the Trash:
- Select the Trashcan icon in your Mac’s Dock.
- Locate the file that you just deleted.
- Drag this file out of the Trash, and then drop it anywhere outside of the Trashcan, for example onto your Desktop.
Explore your Time Machine backups
If it’s been a while since you deleted the file, then there’s a chance that macOS may have already taken out the Trash. Alternatively, perhaps you deleted the file without sending it to the Trash at all, using macOS’ “Delete immediately” feature (Option + Command + Delete).
Even in these scenarios, there’s still a few ways that you can recover a deleted file. Ideally, you’ll be in the habit of creating regular Time Machine backups, which means you should be able to recover an earlier version of this file, by delving into your most recent Time Machine backup:
- Launch Time Machine, either by selecting its icon in your Mac’s menu bar and then selecting the “Enter Time Machine” option; clicking the Time Machine icon in your Dock; or by launching “Spotlight” and then searching for “Time Machine.”
- In the subsequent window, locate the item that you want to restore. You can preview a file, by selecting it and then pressing the “Space” bar.
- Once you’ve located the version of the file that you want to restore, select it and then click “Restore.”
Recover an earlier version of a file, without Time Machine
Imagine you want to restore an earlier version of a file and you have a relevant Time Machine backup. In this scenario, you could use the instructions in the previous section to restore an earlier version of this file from your most recent Time Machine backup – but it may also be possible to restore the file without trawling through your Time Machine backups.
By default, macOS creates local “snapshots” of the documents you’re working on, across a range of different applications. As a general rule, you stand a better chances of discovering a relevant snapshot when the file was created using one of Apple’s own applications, rather than a third party app. However, it only takes a few seconds to check whether a snapshot is available, so it’s always worth a try:
- Open the file in question.
- In the menu bar, select “File > Revert To…”
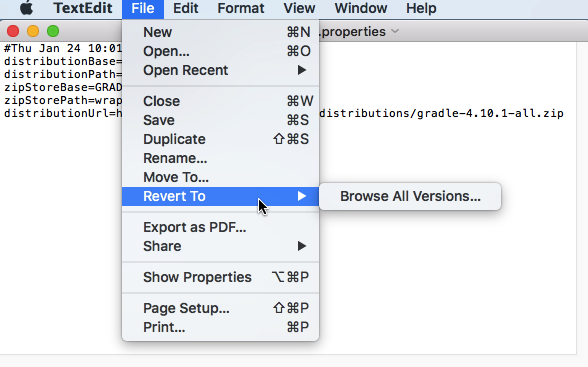
- Select “Browse all versions.” This launches a screen containing all the available snapshots for this particular file. If this screen doesn’t contain any snapshots, then bad luck: none are available for this particular file.
- Spend some time rifling through the available snapshots, using the “Up/Down” arrows.
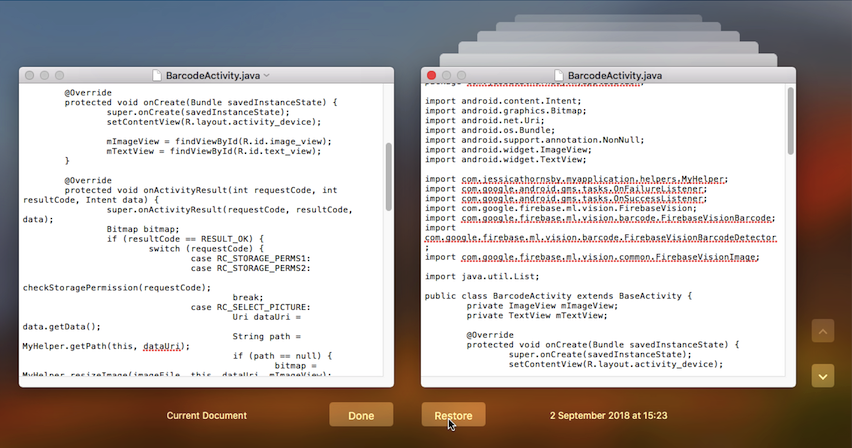
- Once you’ve found the version that you want to restore, select it and then click “Restore.”
Need something more drastic? Restore a full Time Machine backup
Most of the time, it won’t make sense to restore an entire Time Machine backup, just to recover a single file. However, if you want to recover multiple files, or large files that would take a considerable amount of time to re-download, then it may be easier to restore an entire Time Machine backup.
Just be aware that when you restore a Time Machine backup, you’ll lose any changes you’ve made since that backup was created. If there’s any files that you want to hang onto, then make sure you copy them to an external drive, or stash them in an online storage service such as DropBox, before proceeding.
To restore a Time Machine backup:
- Boot up your Mac while holding down the “Command+R” keys.
- When you see the Apple logo, release these keys. Your Mac will now boot into Recovery Mode.
- In the subsequent “Utilities” window, select “Restore from Time Machine Backup.”
- Click “Continue,” and then when prompted click “Continue” again.
- Choose the Time Machine backup that you want to restore, and then click “Continue.”


Add Comment