

An audio podcast can be a great way to share your opinions online or to publish in iTunes, but it needn’t be hard to record, edit and create one. Recording a podcast is a breeze using the built-in tools that come with every new Mac, and the whole process of editing and exporting takes just a few minutes for a simple audio podcast. This tutorial explores some of the easiest ways to create one.
Podcast Tips
Before we begin, here are several tips to ensure you get the most from your podcast recording:
- Use a good quality external USB microphone – this is preferable to the Mac’s built-in mic or even a headset which can pickup breathing noises
- Record your podcast in a quiet room that’s free from background noise and other distractions
- Don’t worry if you make a mistake, because you can always edit the podcast later on
Podcast Recording
You can record a podcast on the Mac without any additional software. The two most popular apps to use are Garageband and QuickTime Player. There are also several third-party apps in the Mac App Store available especially for podcasts. The tools already available on the Mac are described below.
![QuickTime Icon]() Record Using QuickTime Player
Record Using QuickTime Player
To make your audio recording in QuickTime Player, follow these simple steps:
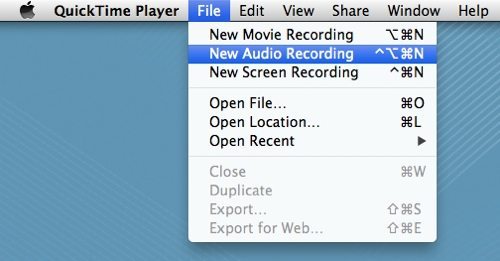
1. Open QuickTime Player from the Applications folder or from Spotlight
2. From the File menu, choose New Audio Recording (or use Ctrl + Option + Command + N):
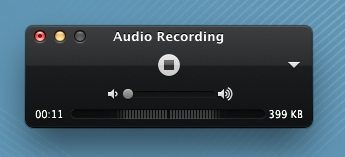
3. The Audio Recording window opens and shows various controls. Press the red Start button to begin
4. When you’ve finished the recording hit the Stop button to save the file – it will be saved in your Home folder under Movies, and will be called Audio Recording.m4a. The next step is to open the file in an editor such as GarageBand
![Podcast Capture]() Record Using Podcast Capture
Record Using Podcast Capture
 Record Using Podcast Capture
The Mac has two very useful built-in applications called Podcast Capture and Podcast Publisher which are located in the Applications -> Utilities folder.
Just launch the Podcast Capture application and follow the onscreen instructions to start recording. However, GarageBand (covered in the following sections) has lots more editing options, so we’ll concentrate on that in this tutorial.
![GarageBand Icon]() Record Using GarageBand
Record Using GarageBand
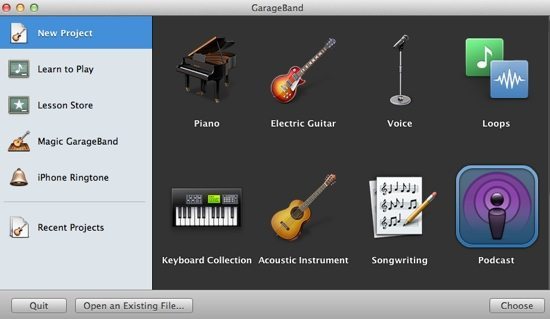
1. Open GarageBand from the Applications folder or from Spotlight
2. When prompted to create a new project choose Podcast as shown in the screenshot below
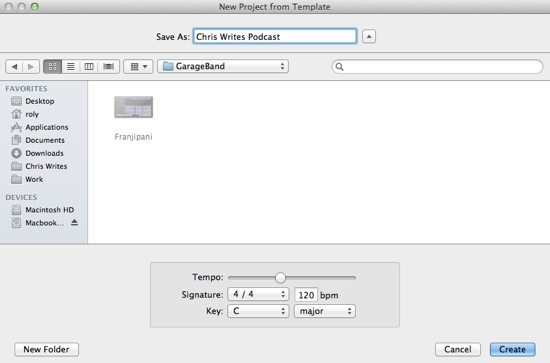
3. Next, choose a name and save location for your podcast and click Create
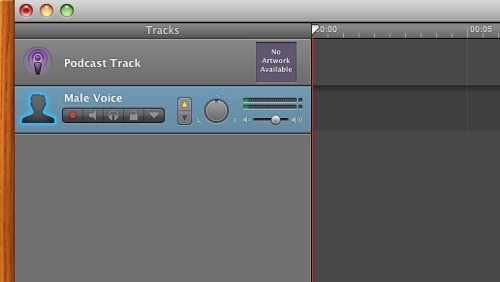
4. If you’re just going to record a single podcast track, make sure that you’ve only got one track in the list shown on the left of GarageBand. Delete any unnecessary tracks by holding down Command + Delete to remove them. The GarageBand window should now look something like this:
5. You should be able to leave the default GarageBand settings as they are. When you’re ready to record just press the big red record button at the bottom of the GarageBand window:

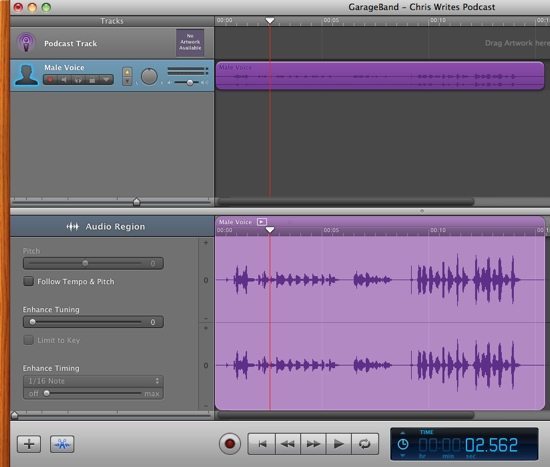
6. When you’re done, hit the red button again to stop recording and you should see the waveform displayed in the main window as shown below. Use the spacebar and recording controls (play, rewind, etc) at the bottom to play back and check your recording:
You’re now ready to edit your podcast (see the Editing section below)
Editing in GarageBand
If you’ve already recorded the podcast in GarageBand, you should now be ready to edit the voice recording. If you recorded the podcast using QuickTime Player or another app and want to edit in GarageBand, follow the steps below first.
Import a QuickTime Recording
1. Import your audio into GarageBand by creating a new Project as in the previous steps
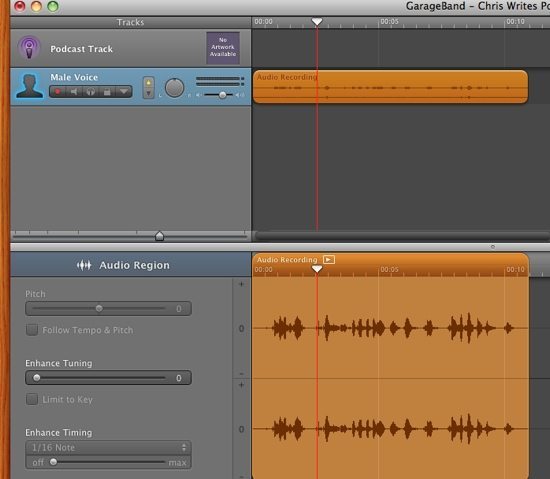
2. Locate your QuickTime Audio Recording m4a file and drag it into the main GarageBand window. It will appear in orange and is ready to edit. Note there is no import item in GarageBand’s menu – just drag and drop your audio file into GarageBand
The next step is to edit the audio – regardless of whether it was recorded in the app itself or imported from elsewhere.
Edit Your Audio
GarageBand lets you do lots of things to your audio sample – for example crop, move and even apply lots of fun effects. To crop the audio so that only the relevant sections make the final cut, click the mouse on the lower window and drag left or right to select the portion that you want to use. It will be highlighted in a darker colour. Next, double click to accept the new selection.
In the top window of Garage Band, you can select the sections that you don’t want and remove with the delete key. You can also add chapters and markers to you podcast – in fact, the possibilities are almost endless and it’s certainly worth playing around with GarageBand to make use of all its features.
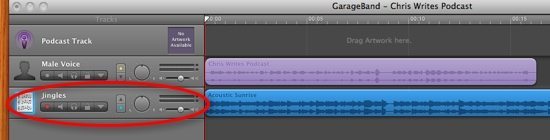
Add Jingles and Sound Effects
You can add jingles and other sound effects to your podcast as follows:
1. In the right hand panel of GarageBand, click on the Loop Browser icon (the eye icon) to view all the available loops
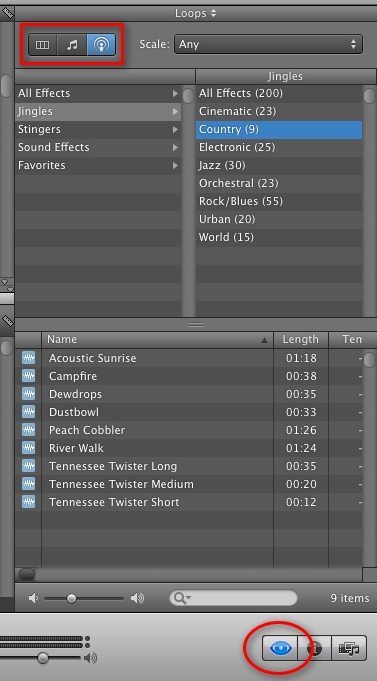
2. In the bottom of the Loop Browser window, click once on any item (such as Acoustic Sunrise in the screenshot above) to listen. Once you’ve chosen a suitable loop, drag and drop it into the main GarageBand window – either below your main audio recording or in the leftmost panel as shown below:
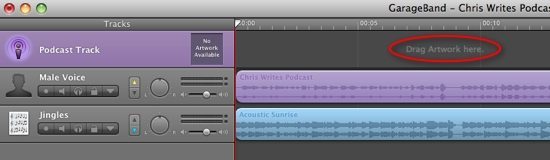
Add Artwork to Your Podcast
If you want to add album artwork that will be displayed when your podcast is played, follow these steps:
1. Click the Media Browser button to browse all your available photos and other media:
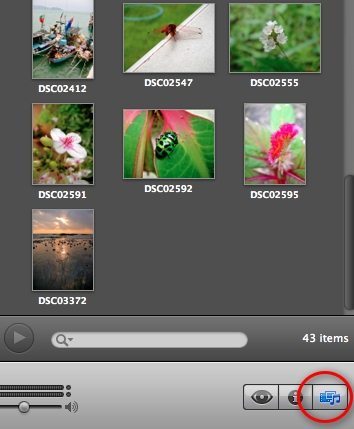
2. Next, drag and drop the picture you want into the main window – where it’s labelled Drag Artwork Here


Thanks so much. This is really clear and helpful.
Thanks for this! I appreciate the simple, straightforward walk through as I am trying to make my first podcast for my undergrad students.