

Anyone that deals with lots of files will invariably need to rename them to something more useful from time to time. When you have hundreds of files that need to be renamed however, doing it manually in Finder is just way too labour-intensive – surely there’s a simpler method?
Renaming single files on the Mac is incredibly easy – just select a file, click once and type in the new name. However, how to batch rename files is not all that obvious. Luckily Mac OS X has a built-in tool called Automator that can quickly automate hundreds of common tasks – including renaming files.
There are several ways to batch rename files on the Mac:
- Create a rename workflow using Automator
- Create a rename workflow application using Automator
- Create a rename workflow service with Automator
- Use AppleScript to rename your files
- Use a shell script in terminal to rename your files
- Use a third party renaming application
AppleScript and Shell Scripts
AppleScript and shell scripts (the latter are normally run from within Terminal) are not straightforward for novices and are only really recommended for advanced users or anyone familiar with programming. There are quite a few sample scripts available on the Internet, but using Automator is generally much more convenient and can save you a lot of time.
Third Party Batch Renaming Apps
There are plenty of third party applications that can batch rename your files. In general they all have fairly similar features – some are free while others are not.
A few common renaming apps that you can find in the Mac App Store are as follows:
Create an Automator Workflow
Automator allows you to quickly create custom workflows to rename your files. You can use the workflow within Automator or save it as an application that allows you to drag and drop the files you want to rename when needed. The renaming options are extensive – it’s possible to add the date and time, insert custom text strings, change the case, make them sequential, and so on.
Using Automator means that you don’t need to mess about with complicated scripts, and it’s also built right into Mac OS X so it’s by far the easiest option. Besides, once you realise the power of Automator and what else it can do, you’ll be tinkering with it for days automating many other daily tasks on your Mac!
Building The Workflow
To create a suitable Automator workflow, proceed as follows.
1. Open Automator from Spotlight or within your Mac’s Utilities folder.
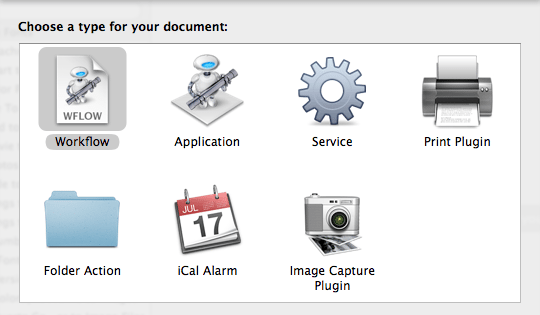
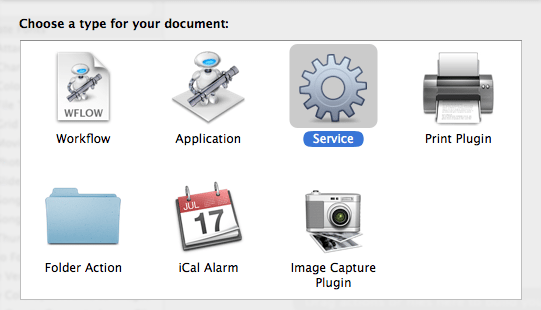
2. When prompted to choose a document type, select Workflow as shown below.
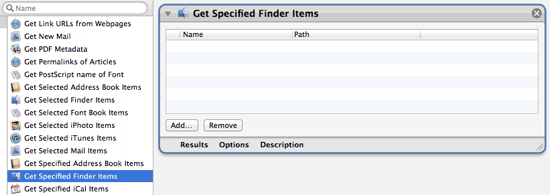
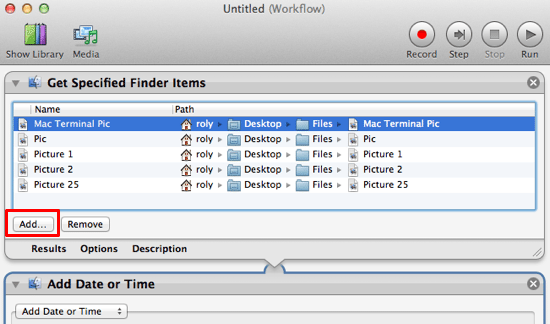
3. In the left hand column of Automator, use the search field to find the item named Get Specified Finder Items and drag it into the main window (labelled Drag actions or files here to build your workflow) on the right hand side.
Notice the little Add button that can be used to add files and folders into your workflow. If you plan to run the workflow within Automator (i.e. when you close the application it’s not saved anywhere to re-use later) this is where you choose which files to rename. Otherwise, this can be left blank for the moment, as the workflow will be run as an application.
The workflow should look something like this:
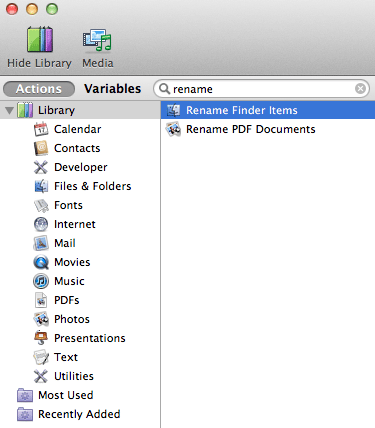
4. Next, use the search field to locate the item called Rename Finder Items and drag it into the main workflow window.
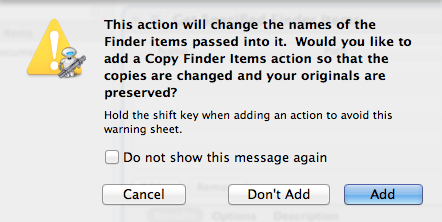
5. A popup window appears and asks if you want to make a copy of the files or not. If you choose Add an intermediate step is added that copies your files but leaves the originals untouched. If you choose Don’t Add, the original files will be renamed and saved in the same folder.
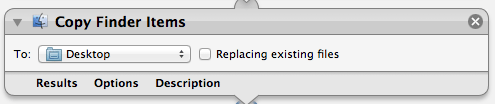
6. If you choose Copy Finder Items, you need to select the folder where copies of your original files will be saved to, such as the Desktop or another folder:
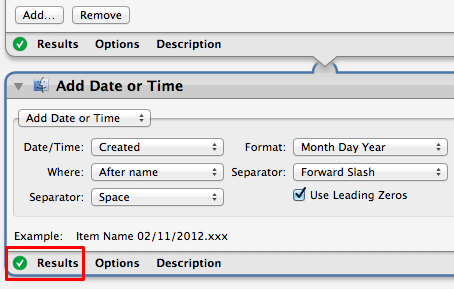
7. The next step in the workflow is automatically added. The input to the rename process is the output from Copy Finder Items. Six renaming options are available – use the drop-down field at the top-left of the workflow to choose the one you want.
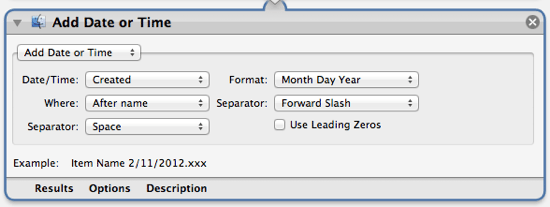
- Add Date or Time – inserts the date and time into the filename. There are many different format options available:
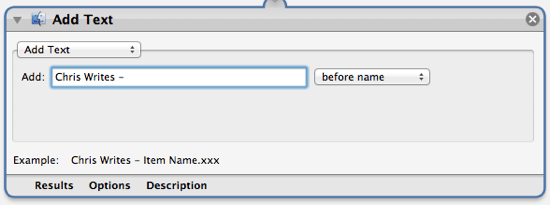
- Add Text – inserts text before or after the filename or as the file extension:
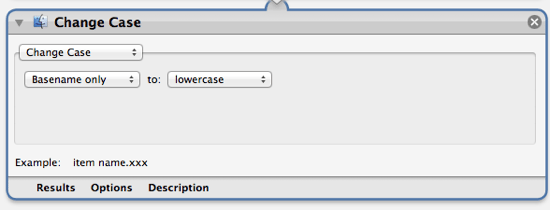
- Changes the filename to uppercase, lowercase, or Title Case (the first letter of each word and the filename extension are capitalised):
- Make the filename sequential with incrementing numbers before or after the filename:

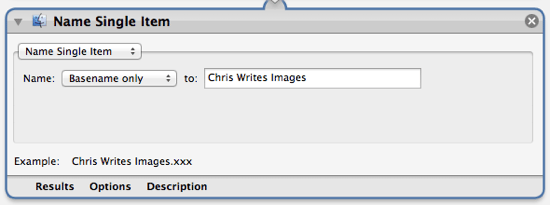
- Rename a single file. Note this option can’t be used for more than one file at a time, as it will give all the input files the same name and obviously result in an error. As a consequence, this item can only be used to rename multiple files if you move each file into separate folders first before you proceed to rename the next one. However, this option can save you a lot of time rather than typing filenames in by hand:
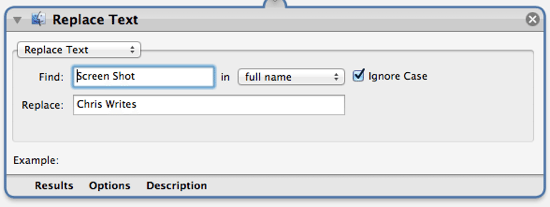
- Replace the specified text with a new string:
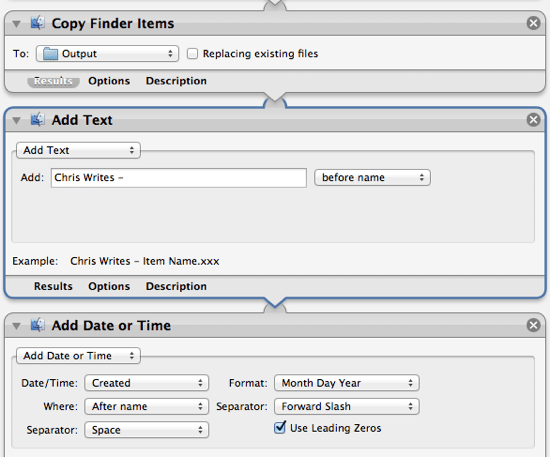
8. It’s even possible to incorporate multiple steps in the workflow as input/output to each other. For example, suppose you wish to add text before the output filename and append the date and time onto the end. To do this, simply drag another instance of Rename Finder Items from the list of Library Actions on the left into the workflow as shown below. Note that you can reorder any step in the workflow by dragging and dropping it into the correct position.
9. At this point when you’ve chosen all the renaming options, there are two choices:
- Run your workflow in Automator
- Save the workflow as an application that can be use repeatedly without needing to open Automator
To Run The Workflow in Automator
- Select the files to rename by clicking the Add button shown in Get Specified Finder Items (the first step shown at the top of the workflow), or simply drag and drop files from Finder.
- Click the Run button on the top right of the workflow window to begin renaming.
If the workflow is successful the Results tab at the bottom of each step displays a small tick mark within a green circle (and your Mac makes a happy little chime) – you can view more information by clicking on Results. Your files should have been renamed and saved either in the original directory, or it will have created copies of your files with the new names in the folder specified in step 6.
If the workflow is unsuccessful, your Mac will make a rather disgruntled ‘ding’ noise, and you can subsequently try again.
To Run The Workflow as an App
Your newly-created rename workflow can also be saved as an application, which allows you to re-use it many times simply by dragging files onto its application icon (the Automator robot icon is always used).
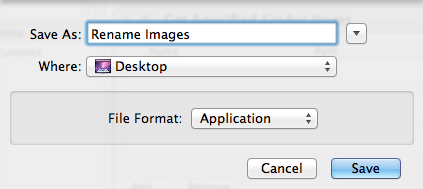
1. From Automator’s File menu choose Save and enter the app’s filename and destination folder where you want to save it. In the File Format section, select Application and hit the Save button.
You now have a handy little application that can be used to rename practically any files and folders on your Mac.
2. The next step is to run the app – drag some files onto the icon of your new Automator renaming app. The files will be renamed and copied to the folder specified earlier, or left where they are complete with the new names.
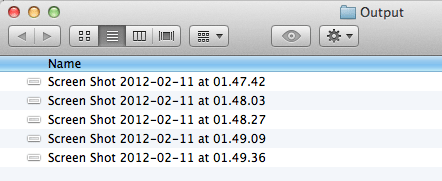
As an example, the source image files as follows…
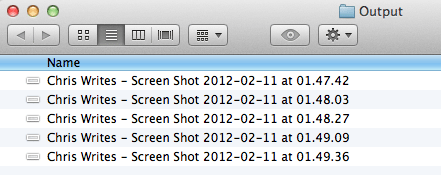
…were renamed to include the text Chris Writes at the start of each filename:
Create a Renaming Service Using Automator
Automator can also create a batch file renaming workflow that can be saved as a service. This means that it’ll be accessible from the Services menu in Finder once you’ve selected a file or folder.
The steps to create a service in Automator are as follows:
1. Open Automator from Spotlight or the Utilities folder.
2. Select Service and click the Choose button to open the Automator main window.
3. At the top of the main Automator window, change the inputs to files or folder in Finder as shown below.
4. As before, search the Library Actions on the left to find Rename Finder Items and drag it into the main Automator window. The workflow should look something like this:
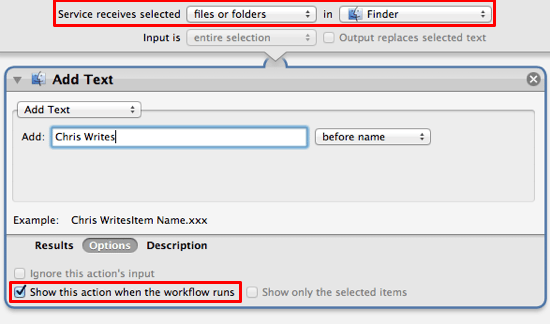
5. Change the workflow to whatever you want it to do – such as add text or sequence numbers, the date and time, and so on.
6. Make sure the checkbox labelled Show this action when the workflow runs is ticked, which causes a confirmation window to appear when you run the service (shown below).
7. From the File menu, Save the service and choose an appropriate name. The service is saved in your Services folder at:
~/Library/Services/<service name>.workflow
Note that the service can only be removed from Finder’s Services menu by deleting the service from the folder above. There is no option within Automator to delete any services you’ve created.
8. Open Finder and highlight all the files you want to rename.
9. In the Finder menu, select Services and choose the name of your renaming service. A dialog window opens (as shown below) prompting you to enter various options as determined by the workflow. When you’ve done that, just choose Continue and Hey Presto the files you selected will be automatically renamed.


Before you go
After spending over 20 years working with Macs, both old and new, theres a tool I think would be useful to every Mac owner who is experiencing performance issues.
CleanMyMac is highest rated all-round cleaning app for the Mac, it can quickly diagnose and solve a whole plethora of common (but sometimes tedious to fix) issues at the click of a button. It also just happens to resolve many of the issues covered in the speed up section of this site, so Download CleanMyMac to get your Mac back up to speed today.


Thanks HEAPS for this Chris. Really clear, concise instructions and well written. Very impressed. Saved me a heap of time! Thank you thank you thank you!!!
can i ask a question that i cannot seem to figure out. How do i set an automator script to rename a file in sequential order into another folder, taking into account what is in the folder already? i.e. if i want to do the rename one file at a time, rather than a batch rename? Can anyone help me with this. Much appreciated!
Awesome, so many thanks. This worked perfectly.
INCREDIBLE! I just recovered 1000+ accidentally deleted photos which the recovery software named with codes. Your clear tutorial enabled me to rename them in a batch in just a few minutes! Thank you!