


There’s no shortage of automation tools available for macOS, but if you want to automate every part of your Mac, then Hammerspoon is one of the most powerful and versatile automation tools out there.
Rather than building workflows via menus and drag-and-drop interfaces, Hammerspoon is built on a powerful Lua scripting engine. While this does mean that getting to grips with Hammerspoon requires significant time and effort, once you’ve mastered the basics you’ll be able to create custom notifications, your own menu bar items, and generally automate pretty much every task on your Mac.
In this article, I’m going to get you up and running with Hammerspoon, and create a few simple scripts that display various notifications.
Hammerspoon Quickstart
Let’s start by getting Hammerspoon setup:
- Head over to its GitHub page and download the latest stable release. Make sure you download the Hammerspoon zip file, rather than the source code!
- Once the file has finished downloading, unzip it and launch the resulting app.
- The first time you launch Hammerspoon, it’ll present you with a preference pane. You can select and deselect the various options, depending on your preferences, but you must enable accessibility in order to use Hammerspoon properly, so give the ‘Enable Accessibility’ button a click.
- When prompted, click ‘Open System Preferences.’ This should launch macOS’ regular ‘Security & Privacy’ window.
- Make sure the ‘Privacy’ tab is selected.
- Click the little padlock in the bottom-left corner, and enter your admin password.
- Find the ‘Hammerspoon’ app, and give its accompanying checkbox a click.

- Close the ‘Security & Privacy’ window.
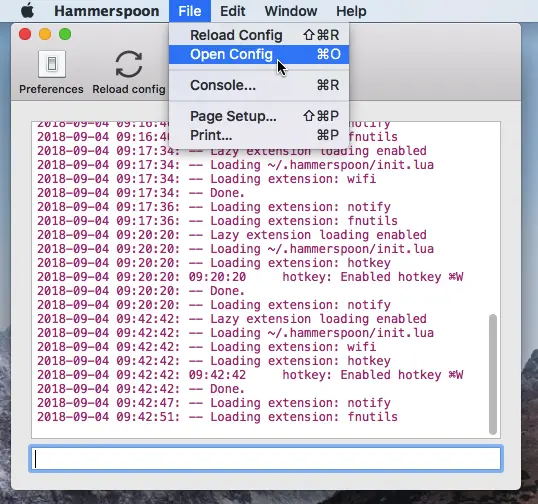
- At this point, you should see Hamerspoon’s Lua console. Select ‘File > Open Config’ from the Hammerspoon menu bar.
You should now see a ‘init.lua’ text file. This is where we’ll be creating our first script.
Your first Hammerspoon script: Displaying a notification
Let’s start with something simple that you can test straight away, by creating a keyboard shortcut that triggers a notification.
Copy/paste the following into the init.lua window:
hs.hotkey.bind({"cmd", "h"}, "W", function()
  hs.alert.show("Hello from Hammerspoon!")
end)
- Select ‘File > Save’ from the menu bar.
- Select the ‘Hammerspoon’ icon from your Mac’s menu bar and then click ‘Reload Config.’
- Press the ‘Command + h + w’ keys on your keyboard. Your custom notification should now appear onscreen.

Getting Wi-Fi notifications
Now we know how to issue a notification, the next step is displaying a notification in response to certain events.
If you don’t have a reliable Wi-Fi network, or your Mac regularly switches between different networks, then it may help to display notifications about the current state of your Wi-Fi connection.
In this section, we’re going to create a script that’ll display a notification whenever the Wi-Fi signal is lost, and then displays another notification every time your Mac connects to a new network, complete with the name of the network that it’s just connected to.
Copy/paste the following into your init.lua file:
wifiwatcher = hs.wifi.watcher.new(function ()
    net = hs.wifi.currentNetwork()
    if net==nil then
        hs.notify.show("You lost Wi-Fi connection","","","")
    else
        hs.notify.show("Connected to Wi-Fi network","",net,"")
    end
end)
wifiwatcher:start()
- Select ‘File > Save’ from your Mac’s menu bar.
- Select the ‘Hammerspoon’ icon and choose ‘Reload config.’
Try disconnecting from your Wi-Fi network, by selecting the ‘Wi-Fi’ icon in your Mac’s menu bar and choosing ‘Turn off Wi-Fi.’ You should see a notification warning you that the Internet is disconnected. Reconnect to your network, and it should trigger another notification, complete with the name of the network that you’ve just connected to.
Running multiple Hammerspoon scripts
We may have pasted our Wi-Fi script over our original ‘Hello from Hammerspoon’ script, but it is possible to run multiple Hammerspoon scripts side by side. In this final section, we’re going to create our scripts as separate .lua files, and then reference each script from that all-important init.lua file.
- Select ‘File > Open config.’ This launches the default ‘init.lua’ file.
- Select ‘File > Rename…’
- Give this file the name ‘hello.lua.’
- Copy/paste your ‘Hello from Hammerspoon’ script into this file.
- Select ‘File > Save.’
- Close this window.
- Select ‘File > Open config.’ Once again this launches the ‘init.lua’ file.
- Select ‘File > Rename…’ and give this file the name ‘wifi.lua.’
- Copy/paste your Wi-Fi script into this window.
- Click ‘File > Save.’ Close the window.
At this point, we have a separate ‘hello.lua’ and ‘wifi.lua’ file. We now need to reference both of these files, from init.lua.
- Select ‘File > Open config.’ This launches the default ‘init.lua’ file – at last, this is the file we actually need!
- Reference ‘hello.lua’ and ‘wifi.lua’,’ by copy/pasting the following script into ‘init.lua.’
local wifi = require('wifi')
local hello = require('hello')
- Select ‘File > Save.’
You can now put these three scripts to the test:
- Select the ‘Hammerspoon icon from your Mac’s menu bar, and then click ‘Reload config.’
- Press the ‘Command + h + w’ keys – this should trigger the ‘Hello from Hammerspoon’ notification.
- Disconnect from the Wi-Fi, and you should get a notification warning you about the lost connection.
Where next?
The great thing about Hammerspoon, is that you don’t have to write your own scripts, as there’s countless ready-made scripts available online. Whenever you find a script that you want to use, simply save it as a .lua file and then reference this file from your main ‘init.lua’ file.


Add Comment