


OS X Mountain Lion is Apple’s latest and greatest Mac OS, so it’s no surprise that it’s already become a hit with Mac users everywhere. Even though Mountain Lion is generally regarded as better, faster and more polished than Lion, there are still various tips and tricks that you can try to make it even quicker.
For those on older Macs with slower processors and disks, it’s even more important to keep everything running smoothly to ensure the best overall user experience. This article describes some of the many techniques you can use to speed up your Mac running Mountain Lion.
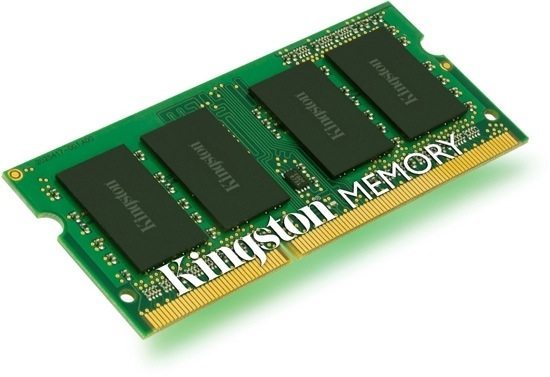
1. Install Additional Memory
You might wonder how additional memory can speed up Mountain Lion, but for any computer it’s one of the most effective (and cheapest) ways to improve performance in general. The reason is that RAM is required for applications and the more apps you have open, the more memory is consumed. Mountain Lion officially only requires 2 GB of memory to run, but in real-world usage it’s not really enough. Check out reliable memory suppliers such as Crucial – an 8 GB pair (2 x 4 GB) can be bought for as little as £30. Unfortunately, the MacBook Air’s memory cannot be upgraded because it’s soldered onto the motherboard, but for MacBook Pros it’s a relatively simple upgrade that should take only 5 minutes and is a task that can be easily done at home.
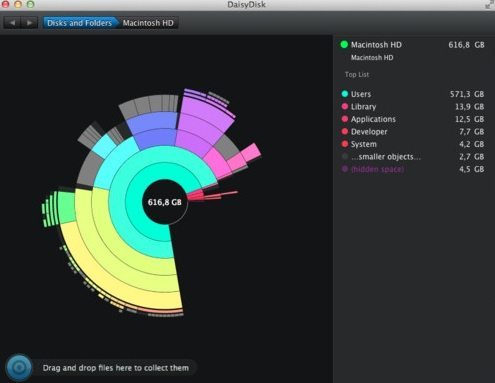
2. Free Up Disk Space
Your Mac needs at least 5% of free disk space to function properly. Sufficient disk space is essential for apps, music and media content, as well as being used for virtual memory should your physical memory be insufficient. To reclaim disk space, delete or compress unused files and folders or archive them off to an external USB drive.
DaisyDisk (£6.99 from the App Store) is a great app that lets you immediately see the size and distribution of files on your disk, so you can quickly identify any particularly large ones that you might wish to delete.
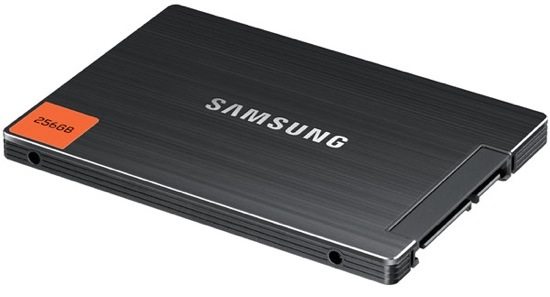
3. Upgrade to an SSD
Unless you’ve bought an expensive Mac with an SSD (sold state disk) already built in, the chances are that your Mac came with a slower traditional hard disk that spins at either 5,400 or 7,200 RPM. Such disks have relatively large capacities and so are great to store lots of files, though they are much slower than an SSD. These days, a 256 GB SSD can be obtained for around £140 and prices are coming down all the time. One day, all Macs will come equipped with an SSD…
If you install an SSD, there are several options:
- Install the SSD in your Mac and then a clean installation of Mountain Lion, followed by an optional Time Machine restore of your files, folders and apps (or just re-download them through the app store)
- Connect the SSD via USB (most models come with a SATA to USB adaptor) and then perform a clone of your existing drive (with an application such as Carbon Copy Cloner which is free). Then simply install the SSD inside your Mac and you’re good to go. You could also buy an external case for your old disk and use it as a USB drive, or keep it in your safe as a permanent backup
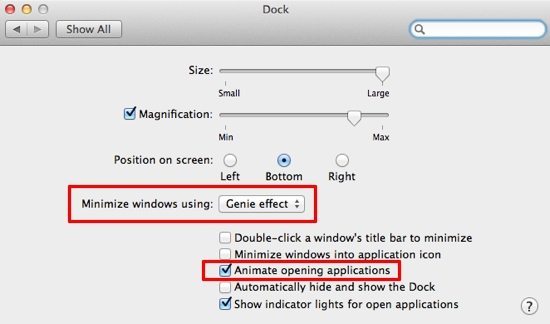
4. Tweak the Dock
The Dock is a nice bit of visual eye candy on the Mac, but it does take up system resources when you’ve enabled the various effects and animations. The simplest thing to do is to disable the Genie effect when minimising windows, and turn off animating open applications.
Follow these steps:
1. Open System Preferences and choose Dock
2. Select Scale effect under the Minimise windows using setting
3. Uncheck Animate opening applications
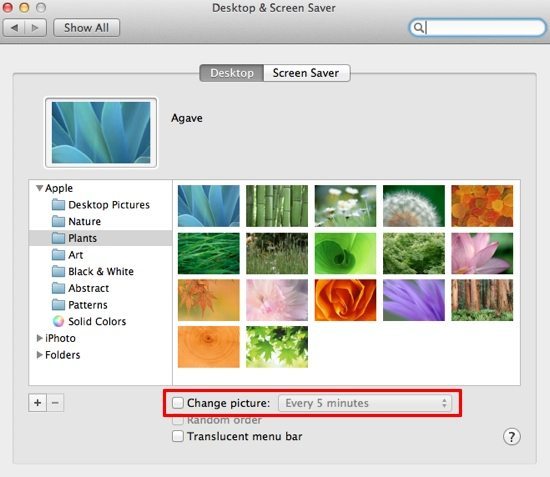
5. Turn Off Desktop Animations
You can disable the desktop picture animations so you always have the same desktop background. While it’s rather more boring than changing the desktop image every once in a while, it does use less processing power and should speed up your Mac just a fraction.
1. Select the Desktop & Screen Saver icon in System Preferences
2. In the Desktop tab, uncheck the Change picture setting to use a single desktop image
There are lots of other eye candy settings in Mountain Lion that you can disable to speed things up. Small changes add up, so no matter how insignificant something might seem, it can definitely make your Mac faster.
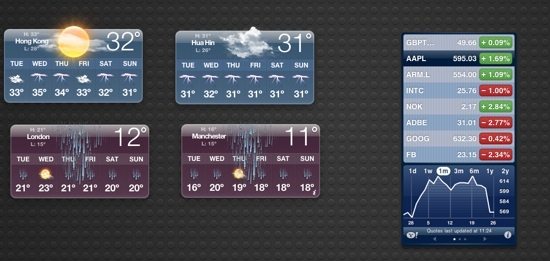
6. Close Unnecessary Dashboard Widgets
Dashboard widgets are small apps that can be accessed by pressing the F4 key on your Mac’s keyboard (without holding down the Fn button). There are hundreds of useful widgets, but every single one takes up some memory and CPU resources even though it’s hidden out of the way. It’s a good idea not to have dozens of widgets running, so close down any that you don’t use (just hold the ALT key and hit the X button that appears next to each widget).
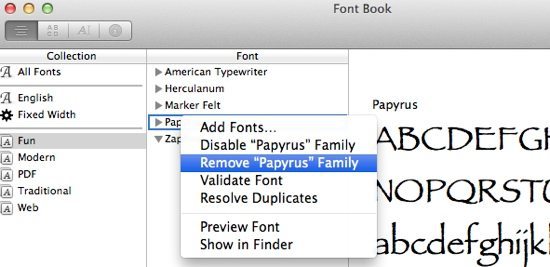
7. Remove Unused Fonts
Unused Fonts take up valuable disk space and can actually decrease performance. Besides, it’s incredibly simple to remove fonts that you never use or may not even realise you have installed.
1. Launch Font Book from the Applications folder
2. Scroll through the list (or use the Search function in the upper right) to find fonts you want to remove
3. Select the font you want to remove, right-click and select Remove <Font Name> Family or choose the same option from the File menu
4. Confirm that you really do want to remove the font when prompted
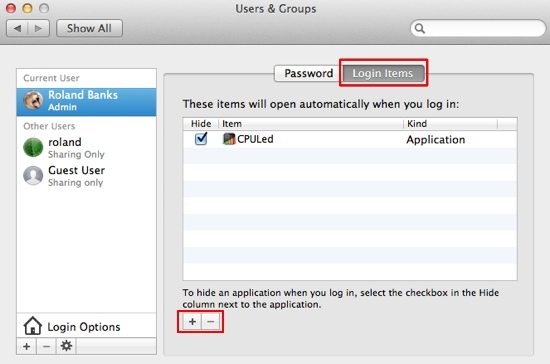
8. Disable Startup Items
It can be extremely convenient to have your most commonly used apps open when you login to your Mac, but the trouble is that as you add more and more to the list, things start to become slow as all those apps try and open at the same time.
To resolve the issue, try and limit the number of startup items that you have. To see what’s set to launch when you login, go to Users & Groups in System Preferences, select your user account from the left hand panel, and then choose the Login Items tab in the main window. Here you can add and remove any apps you want, but it’s best to try and keep the list as small as possible.
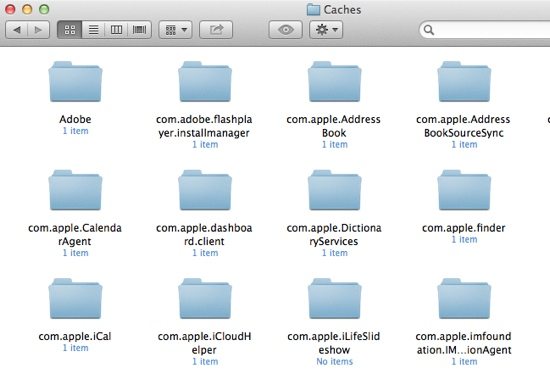
9. Delete Caches and Logs
Over time, most of your apps build up local caches and log files that can clog up your system. Most of the caches are stored in the ~/Library/Caches folder (use COMMAND + SHIFT + G in Finder to open this hidden directory) and can be deleted manually. Log files are likewise stored in the ~/Library/Logs folder and can be safely deleted.
10. Perform a Fresh Mountain Lion Installation
If you’ve upgraded to Mountain Lion from Lion, which itself was an upgrade from Snow Leopard, which itself…well, you get the picture. Multiple upgrades could severely hamper your Mac’s performance, because of the old legacy files and preferences that might still be lingering and clogging things up. It’s always best to perform a clean install to get the optimum performance. If your Mac seems slow with Mountain Lion, try a fresh install and then just migrate your old data and apps back using Time Machine.
Having said that, some users never experience any slowdown issues even after several upgrades; it probably depends on many factors such as how many apps you have installed, your particular hardware, and how your files are distibuted over the hard disk.

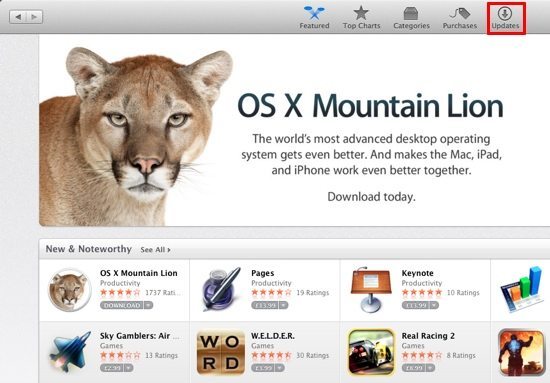
11. Keep Apps Up to Date
Old applications that never get updated won’t be able to take advantage of the latest performance features in OS X, such as hardware acceleration and OpenCL. Always keep apps up to date, either through the Mac App Store (by far the easiest way as you’ll receive automatic notifications) or by regularly checking from within the apps themselves or on the Internet.
You might find that once you’ve updated an old app, the latest version is much faster. You can’t blame Mountain Lion for everything…
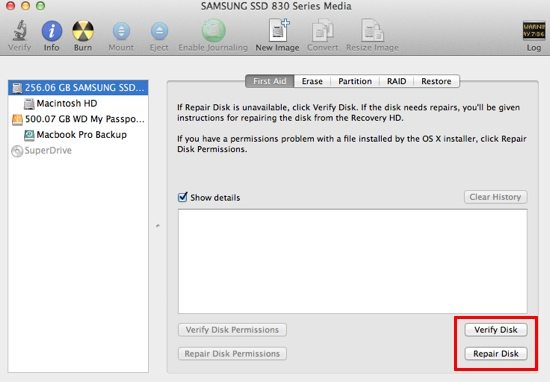
12. Disk Maintenance and Optimisation
It’s recommended that you occasionally check your Mac’s disk for any disk permission errors. Open up Disk Utility and select the Verify Disk button in the First Aid tab to check for any permissions issues. If everything is OK you should see a confirmation message, otherwise you can then use the Repair Disk option.
There are also dozens of disk optimisation apps in the App Store, which can keep you disk in good shape and perform defragmentation (though the Mac is not as prone to fragmentation issues as Windows PC’s are).
Hopefully, if you’ve followed any of all of the recommendations we’ve mentioned, your Mac will stay running smoothly for a long time to come.
Before you go
After spending over 20 years working with Macs, both old and new, theres a tool I think would be useful to every Mac owner who is experiencing performance issues.
CleanMyMac is highest rated all-round cleaning app for the Mac, it can quickly diagnose and solve a whole plethora of common (but sometimes tedious to fix) issues at the click of a button. It also just happens to resolve many of the issues covered in the speed up section of this site, so Download CleanMyMac to get your Mac back up to speed today.


When I first installed Mountain Lion I could not believe how slow it was. So I went on line and discovered your suggestions. I have implemented most of them, still waiting for the additional Memory to arrive and I need to order Drive Genius 3. However, just making the other changes (I already have MacKeeper) I was amazed at the difference. Speed is back up to Lion if not better. Very disappointed in Apple that they would produce an o/s that is slower than the previous o/s.
Thanks so very much for your suggestions.
I’ve been a devoted Mac user since 1996 and it’s been my experience through every upgrade that each OS has run slower than the previous version. The reason for this is that software engineers are always developing for the future; that’s not a bad thing. Those of us with older machines (mine currently is 1.5 years old) have to go through a few steps to get better performance, but that’s ok.
Of all the suggestions above, I believe the two most critical would be permissions and fonts, fonts, fonts:)
Learn here :- How to speed up Mountain Lion
http://www.youtube.com/watch?v=haNyHY2Bp6A
good stuff mate! Just got my fresh Mtn. Lion on my MBA…works like a charm…
good stuff mate! Just got my fresh Mtn. Lion on my MBA…works like a charm…
There are some optimization work which can be done to speed up Mountain Lion.
Stellar Speed Up Mac is one of the best optimization tool which helps you to remove all unwanted stuffs from your Mac.
There are some optimization work which can be done to speed up Mountain Lion.
Stellar Speed Up Mac is one of the best optimization tool which helps you to remove all unwanted stuffs from your Mac.
Except 1,3,7,9,10 I didd all the steps and it appears that my mac is much faster now…. Amazing how little things can help!
Esp, my dashboard was cluttered, and I realized I have never used it in a very long time.
Except 1,3,7,9,10 I didd all the steps and it appears that my mac is much faster now…. Amazing how little things can help!
Esp, my dashboard was cluttered, and I realized I have never used it in a very long time.