

![]() Mac OS’s Mail app has never made it especially easy to create customised signatures. Its signature editor contains just a very simple text entry field where you can type characters and highlight them as bold, italic or underlined, but there aren’t many more options than that. It’s not easy to make a signature stand out if you use the signature editor within Mail.
Mac OS’s Mail app has never made it especially easy to create customised signatures. Its signature editor contains just a very simple text entry field where you can type characters and highlight them as bold, italic or underlined, but there aren’t many more options than that. It’s not easy to make a signature stand out if you use the signature editor within Mail.
This tutorial describes how to create cool HTML-based custom signatures that can include images and more exciting text than is possible in standard signatures. We’ll look at how to use Mail’s templates in another tutorial, which is a slightly different way of achieving similar results.
Before we begin you will need:
- You should have a HTML editor such as Dreamweaver, Sandvox, etc
- You should be familiar with the basics of HTML if you want to create something a little more complex
- You need access to a web host or DropBox to store your signature’s images
Step 1: Decide What Details To Include
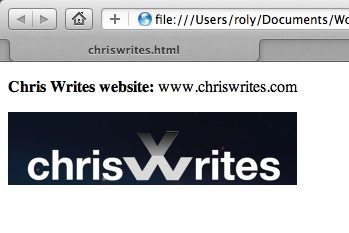
This is the easy part – you need to decide what information you want to display on your signature, for example your name and phone number, company address and perhaps a logo. In this example, we’ll just use the Chris Writes website address and an image copied from the site.
Step 2: Edit Your Signature in a HTML Editor
The most important step is to create a signature using whatever HTML editor you prefer. It doesn’t have to be complicated – just text, colours, graphics and such. The signature in this example was created using Sandvox simply by inserting some custom HTML into a page and exporting it, but you could use any such program or a simple text editor as long as you’re familiar with basic HTML.
The signature I’ve created for this example is shown below.

Any images used in your signature should reside on a web server or a shared DropBox folder that can be publicly accessed, so it’s important that you’ve already uploaded any images to your host and named them suitably. The HTML that you create in the editor should refer to the images stored on your web host. For example, images might be stored at: http://www.yourhost.com/images/image-name.jpg.
Once you’re happy with your new signature, save it as a HTML file to use in the next step. For example, call it signature.html.
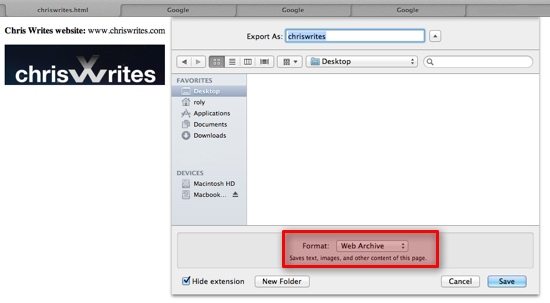
Step 3: Save The Signature as a Web Archive
Next, open Safari and drag the newly-created signature into an open window (or right-click the file and select Open With followed by Safari from the list). Your signature should be displayed in Safari like this:
The next step is to save the signature as a web archive:
- From Safari’s File menu, select Save As or simply hit Command + S to open the file save dialog window
- Make sure that Web Archive is selected in the lower section and name the file something like signature.webarchive. You can name it anything you like because we’ll rename it later anyway
This webarchive is what Mail will use in the proceeding steps.
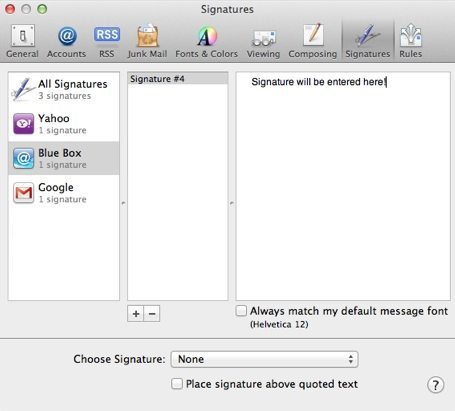
Step 4: Create a New Blank Signature in Mail
Next, you need to create a new temporary signature in Mail so that we can replace the template it creates with our own custom HTML.
- Go to Mail and open Preferences from the Mail menu, or just use Command + ,
- In the Signatures tab, click Add (the little + button) at the bottom of the middle pane
- Give your signature an appropriate name if you wish (e.g. Yahoo signature, Google signature, etc)
- Quit Mail so that next time you reopen it, the new signature is picked up
Step 5: Replace Mail’s Temporary Signature With Your Webarchive
The next step is to locate the default signature just created by Mail, and to replace that file with the custom signature you saved earlier as something like signature.webarchive.
Follow these steps:
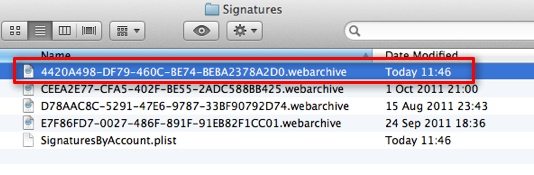
- Go to Mail’s Signatures folder which is located in ~/Library/Mail/V2/MailData/Signatures. The simplest way to do this is to open a new Finder window and just use Command + Shift + G and paste the folder path above into the window that appears. Alternatively, hold down Option (i.e. Alt) and choose the Go menu in Finder, then select Library (keeping the Option key held down) followed by drilling down to the folder described above
- In this folder, you should see a new signature file with a rather long filename. In my case the file was called 4420A498-DF79-460C-BE74-BEBA2378A2D0.webarchive. This is the blank signature that you previously created in step 4. Select the file and copy the filename (not the file but the actual filename). If you have multiple signatures then you can identify the correct file using the Date Modified within Finder (or use Command + I to Get Info)
- Locate your new signature.webarchive file and rename it to the same long filename as the temporary signature
- Copy your new signature into Mail’s Signatures folder, overwriting the file that’s already there. You’ll be prompted if you want to overwrite the file, so just choose Replace when Finder asks
Your Signatures folder should now look something like below. I have 4 signatures setup, with the newest one highlighted at the top.
Step 6: Open Mail and Check Your Signature
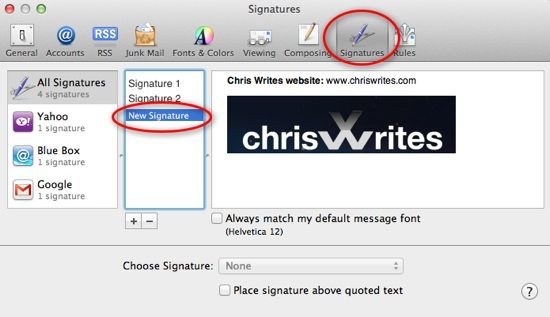
The last step in the process is to open Mail again and go to Preferences. Under the Signatures tab you ought to see the new signature just created, and it’s now ready to use in new email messages. You can give it any name you like within the Preferences panel.
Any images include in the signature may be displayed as a broken link in the Signatures tab, but will display OK within messages that you send.
Lastly, select an email account (if you have more than one) and drag the new signature from the middle panel onto the desired account that you want to use it with. When you create a new email message there’s also an option to select a signature from the new message window.
Before you go
After spending over 20 years working with Macs, both old and new, theres a tool I think would be useful to every Mac owner who is experiencing performance issues.
CleanMyMac is highest rated all-round cleaning app for the Mac, it can quickly diagnose and solve a whole plethora of common (but sometimes tedious to fix) issues at the click of a button. It also just happens to resolve many of the issues covered in the speed up section of this site, so Download CleanMyMac to get your Mac back up to speed today.


Thanks so much. I just followed the steps here and it did the trick.
Why did I need to create HTML email signature? I want to start tracking referers to my site from email signature, and created a google analytics campaign just for my email signature.
Thank you! Every other site I found was wrong in how to do this. You’ve got it right on. Thank you!!