


Notifications are crucial for keeping you informed about events that are happening across your Mac, but also across the World Wide Web. Notifications can give you a head’s up about everything from breaking news on your favourite media websites, to a new ‘like’ on your latest Facebook post. Even better, notifications provide all this information without you having to navigate away from whatever you’re currently doing.
Notifications are great – until they go wrong. Since notifications are designed to grab your attention, once notifications start to misbehave they can become seriously annoying, seriously quickly.
One problem you may encounter, is when an app, website or service starts issuing duplicate notifications. Duplicate notifications are something that can crop up on your Mac at any time, however recently many Sierra users have been reporting problems with Facebook notifications – with some users reporting hundreds of duplicate notifications for every Facebook event!
In this article I’m going to share various tricks and techniques that can help stop duplicate notifications in their tracks. But first, let’s take a few moments to orientate ourselves with a menu that’ll crop up time and time again throughout this article – I’m talking about your Mac’s Notification Centre.
Notification Centre 101
The Notification Centre provides a central hub where you can see all your notifications at a glance, including past notifications you may want to revisit. The Notification Centre is also where you can make edits to how notifications are handled across your Mac.
To access the Notification Centre, either:
- Use a two-finger swipe from right to left, starting at the right edge of your Mac’s trackpad.
- Click the Notification Centre icon in your Mac’s menu bar.

The Notification centre is divided into two areas:
- Notifications tab. This lists your most recent notifications. Clicking a notification typically launches the app or service that generated this notification.
- Today tab. This tab is split into individual views that focus on a specific topic, for example Stocks, Weather, and Calendar.
To exit the Notification Centre, either swipe from right to left on your Mac’s trackpad, or click the Notification Centre icon again.
Put a stop to duplicate notifications
If your Mac is being flooded with duplicate notifications, there’s a number of fixes you can try.
Whether a particular fix will work for you, largely depends on the app, website, software or service that’s issuing the duplicate notifications, and also whether your version of macOS has anything to do with why you’re getting so many duplicate notifications.
I’ve arranged these fixes from the easiest, to the most drastic, so whatever the cause of your notification-related issues, you can start from the top and work your way down this list, until you find the solution that works for you.
Start with the obvious!
Sometimes, the easiest fixes are also easiest to overlook, but it’s always best to rule out the obvious before investing time in more complicated fixes. So, start by trying the following:
- Close the program that’s responsible for the duplicate notifications, then re-launch it.
- If the duplicates are coming from an online service such as Facebook or Twitter, then log out of your account and log back in again.
- Restart your Mac.
You should also check that the notifications aren’t being issued by separate apps that have similar functionality, for example if you have multiple calendar applications then the duplicate notifications you’re receiving about each event may actually be originating from different apps.
Check the app’s individual notification settings
Although the Notification Centre is the easiest way of changing how your Mac handles all notifications, some apps may have individual notification settings that override these global settings. Take a few minutes to check whether the app that’s responsible for the duplicates doesn’t have its own notification settings that may explain this strange behaviour.
To check whether an app has unique notification settings, launch said app and then select its name from the Mac menu bar, followed by ‘Preferences.’ Spend some time exploring the various tabs that make up this menu, to see whether you can spot any settings that are a) notification related and b) might explain why this app is issuing so many duplicates.
Restart Notification Centre
Sometimes, rebooting the Notification Centre may fix your Mac’s strange notification behaviour.
To reboot the Notification Centre:
- Launch your Mac’s built-in Activity Monitor app (Applications > Utilities > Activity Monitor).
- Type “Notification Centre” into Activity Monitor’s ‘Search’ bar.
- Select the ‘Notification Centre’ process.

- Click the ‘Force process to quit’ icon (towards the upper-left of the Activity Monitor window).
- When prompted, click ‘Force quit.’
The Notification Centre will then close and re-launch automatically.
Remove and then re-add your account
You can plug a number of popular Internet services into your Mac, by adding them via your ‘Internet Account’ preferences, including Google, LinkedIn, Facebook and Twitter.
If the duplicate notifications are originating from a service you’ve registered via your Mac’s Internet Accounts feature, then you can try removing and then re-adding your account:
- Click the Apple logo in your Mac’s toolbar and open your Mac’s ‘System preferences…’
- Select ‘Internet account.’
- Select the account that’s associated with the duplicate notifications, then click the little ‘-’ icon towards the bottom-left of the window.
- To re-add your account, click the little ‘+’ icon, select the account you want to add, and then re-enter your login details.
Restart in Safe Mode
Caches can cause all sorts of problems, so you may want to try spring-cleaning your Mac by restarting it in Safe Mode:
- Power down your Mac.
- Press and hold the ‘Shift’ key while restarting your machine.
- When you see the white Apple logo, release the ‘Shift’ key.
- You’re now in Safe Mode!
To leave Safe Mode and boot back into your Mac’s normal mode, simply restart your machine.
Disable notifications
Now we’re starting to get into the more drastic options!
If none of the above fixes work and you’re starting to get seriously fed up of all those duplicate notifications, then you may want to ban the app or service from issuing any notifications.
Note, even if you do disable notifications for this particular app or service, it doesn’t mean you’ll never be able to re-activate them again. Assuming that the software or service is still under active development, then a future update may fix this problem, or if the fault lies with macOS then Apple have a pretty good track record of fixing bugs, so it’s likely that this problem will be fixed in a subsequent release of macOS.
While you wait for an update, you can prevent the app or service from issuing any notifications by:
- Opening your Mac’s ‘System preferences…’
- Selecting ‘Notifications.’
- Selecting the offending app from the left-hand menu.
- At this point, you’ll see three thumbnails representing the different notification types. Select ‘None.’
You’ll probably want to re-enable notifications from time to time, just to check whether the issue has been resolved. To re-enable notifications for a specific app, return to your Mac’s ‘System preferences’ > ‘Notifications’ screen, select the app in question and then choose from the two notification stylers: Banner notifications, and alerts.
Consider downloading an alternative
Not particularly attached to the app that’s clogging up your Mac with duplicate notifications? Then you may want to look for some alternative software that serves the same purpose. Whether this is a viable option for you will vary depending on exactly what app or service is playing up, for example if the culprit is a calendar app then chances are you’re not going to struggle to find an alternative, as there’s no shortage of calendar apps on the market and many share similar functionality.
And if you’re one of the Sierra users who are experiencing problems with Facebook notifications, then you may want to take a look at Go for Facebook. This third party app lets you view Facebook without having to open it in your web browser, which means you can keep up to date on Facebook without being bombarded by duplicate notifications. You can grab this app for free from the Mac App Store.
Do Not Disturb
Perhaps you don’t want to disable the culprit’s notifications completely – you just need a bit of a break! For example, maybe you have an important task you need to focus on, and can’t afford to keep getting distracted by duplicate notifications. The Notification Centre gives you a way of disabling all notifications on a temporary basis, via a ‘Do Not Disturb’ mode.
As long as this mode is active, notifications won’t appear onscreen, although they will be recorded in the Notification Centre, so you can review them at a later date.
To setup a ‘Do Not Disturb’ period:
- Open the Notification Centre and click the little ‘Settings’ cog icon in the bottom-right corner.
- In the window that appears, select ‘Do Not Disturb’ from the left-hand menu.
- Enter the times you want this mode to be active.
- Finally, send your Mac into ‘Do Not Disturb’ mode by selecting the ‘From’ checkbox.

‘Do Not Disturb’ mode will now run until the time specified by you. If you need to exit this mode before its allotted time, then open the Notification Centre, select the ‘Notifications’ tab and drag the ‘Do Not Disturb’ slider to the ‘Off’ position.

Alternatively, you can toggle ‘Do Not Disturb’ mode on and off, by holding the ‘Option’ key on your keyboard while giving the Notification Centre icon a click in the Mac menu bar.
Always report the issue
However you deal with duplicate notifications, you should always report them. Developers can only fix issues they’re aware of, after all!
Even if other users have already reported this issue, adding your voice to the complaint increases the chances of it being taken seriously, which means you’re more likely to see a fix. You may also be able to provide the developer with additional information that can help them build a more thorough picture of exactly what’s going wrong – again, this increases the chances of the issue getting fixed.
If you’re experiencing duplicate notifications, then you can report this issue to Apple in the following ways:
- Via Apple’s dedicated Feedback form.
- By visiting the Apple Support Communities. Search for any threads where people are discussing the same issue you’ve been experiencing. If you do find a thread, then make sure you click its ‘I have this question to’ button so this thread gets more visibility. You should also scan all the posts to see whether there’s any information you can add to the discussion. If you can’t find an existing thread, then you should create one yourself, making sure to provide as much information about your issue as possible.
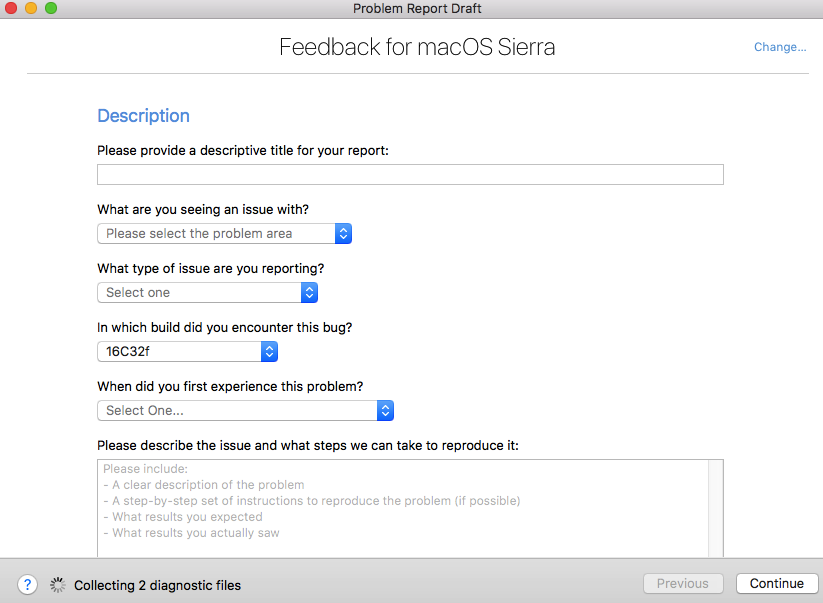
- Feedback Assistant. If you’re running the Sierra beta, then you can provide feedback directly to Apple, using the built-in Feedback Assistant app. You’ll find this app in your Applications/Utilities folder.
When it comes to duplicate notifications, it’s often difficult to tell whether the problem lies with the app or service that’s issuing the notifications, or the operating system itself. Just to be on the safe side, you may want to reach out to the developers behind the software or service in question, as this might be a problem that they can fix, rather than something that Apple has to get involved in.
Before you go
After spending over 20 years working with Macs, both old and new, theres a tool I think would be useful to every Mac owner who is experiencing performance issues.
CleanMyMac is highest rated all-round cleaning app for the Mac, it can quickly diagnose and solve a whole plethora of common (but sometimes tedious to fix) issues at the click of a button. It also just happens to resolve many of the issues covered in the speed up section of this site, so Download CleanMyMac to get your Mac back up to speed today.


Add Comment