

Webcams are a great way of keeping in touch with friends and family, and may even come in handy for taking the occasional photo – but could someone with malicious intent be using your webcam to capture videos and images of you?
The thought that someone might be spying on you through your webcam may sound paranoid, but recent news stories have made it clear that webcam hacking is something that really does happen. In reality, webcams are one of the easier things to hack, to the point where if you venture onto the darker parts of the web you’ll find ready-made software that makes it frighteningly easy to hijack someone’s webcam.
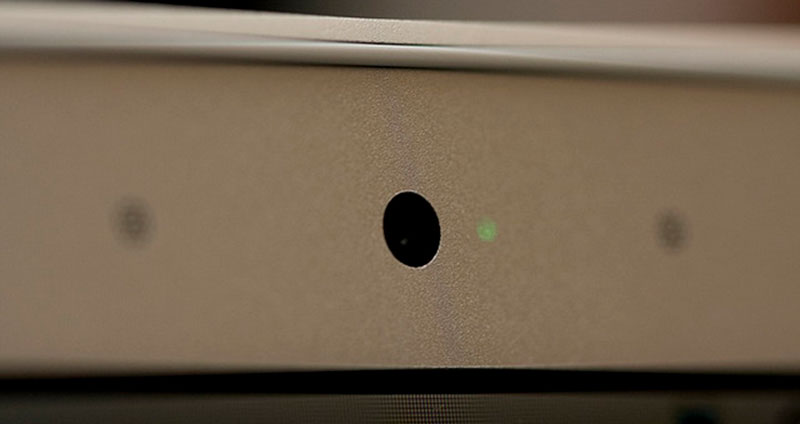
To make matters worse, most Macs come with a built-in webcam that you can’t disconnect or turn away from you like you can with an external webcam – so you essentially have an insecure recording device pointed straight at your face the entire time you’re sat at your computer. Not exactly a comforting thought!
In the past, Mac users may have taken some comfort from the thought that their webcam’s indicator light will be activated whenever their webcam switches on. However, researchers have proven that it’s perfectly possible to activate a webcam without triggering the indicator light, so you shouldn’t rely on this safety feature.
While it may seem difficult to believe that anyone would go to the trouble of hacking your webcam, you can never be too careful when it comes to your online security. Frustratingly, macOS doesn’t provide any way of disabling your webcam, so you’ll need to think outside-of-the-box if you want to protect yourself from potential snoopers.
In this article I’m going to show you how to make sure no-one is spying on you, using a combination of system settings, third party apps and scripts, plus a bit of judiciously-applied sticky tape!
Physically cover the lens
The quickest and easiest way of stopping potential spies, is to block their view. There’s not much that even the most talented hacker can do with a lens that’s physically covered!
This solution may sound simple, but it’s one that’s endorsed by FBI Director James Comey, who has admitted to covering the webcam on his own laptop with tape. It also seems that Facebook CEO Mark Zuckerberg is a fan of this low-tech approach, as he was recently spotted with a piece of tape over his webcam.
You can cover your webcam with anything, although tape and stickers tend to work the best. If you’re worried that an adhesive might mark your machine or leave a sticky residue on your webcam, then you may want to cut a strip off a Post-It note and apply the sticky side to your Mac’s casing, so only the paper portion covers the lens. Alternatively, if you’re worried that a random piece of paper or tape is going to ruin the look of your Mac, then you may want to look for coloured or patterned tape that either blends into your Mac – or stands out, if you fancy making a statement!
If you do decide to cover your webcam, then it’s always worth booting up an app that has webcam access, such as Photo Booth or FaceTime, and double-checking that you really have obscured the entire webcam.
Invest in a slider
If you do use your webcam from time to time, then having to keep removing and re-applying tape is going to get really frustrating, really fast. In this scenario, it may make sense to invest in a slider rather than relying on tape or a piece of Post-It note.
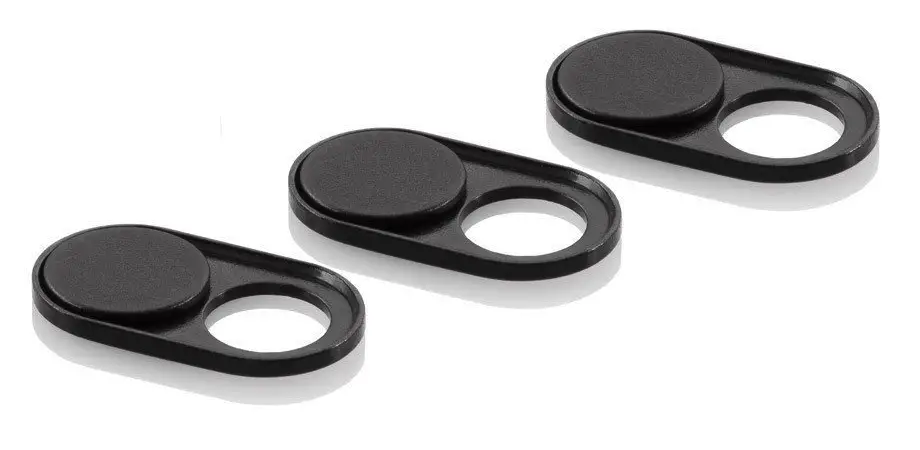
Essentially, a slider is a small piece of plastic that attaches to your webcam. You can then slide it open whenever you need to access your webcam, and slide it back into place when you’re finished.
Be aware of malware
There’s many methods that hackers can use to gain access to your webcam, including infecting your Mac with malware. This has happened pretty recently, in the form of the Backdoor.MAC.Eleanor malware, which allowed hackers to perform all kinds of tasks on infected computers, including activating the webcam.
Keeping up to date with malware threats is always a good idea for the general health and security of your Mac, but it’s also important for ensuring that the only person who has access to your webcam, is you. There’s a number of tricks and techniques you can use to protect yourself against malware – we’ve explored these in detail in our How to protect your Mac from malware article.
Disabling the webcam in specific applications
If an application has webcam features, then often they’ll be a way to disable these features within the app. If you never use your webcam with a particular app, then you should consider disabling these features, as this effectively prevents the app from having access to your webcam. That’s one less application to worry about!
Explaining how to disable webcam features for specific apps is beyond the scope of this tutorial, but you should typically check an app’s ‘Preferences’ or ‘Settings’ menu for any webcam-specific settings. Alternatively, you may find step-by-step instructions on how to disable the webcam in the app’s documentation, at the developer’s website, or in related forums.
Delete QuickTimeUSBVDCDigitizer
If you want to disable your webcam at the macOS level, then you may be able to remove webcam support by deleting the QuickTimeUSBVDCDigitizer.component file.
To check whether this file is present on your Mac, navigate to Macintosh HD/ System/ Library/ QuickTime – you should find the QuickTimeUSBVDCDigitizer component inside this folder. If you do find this file, then you’ll want to create a copy before deleting it just in case you need to re-instate webcam support at a later date. Copy this file, then create a new folder and place the copy inside. You can then go ahead and delete the original QuickTimeUSBVDCDigitizer.
If you do need to re-instate webcam support, then you can simply drag the
QuickTimeUSBVDCDigitizer.component copy to its original location (Macintosh HD/ System/ Library/ QuickTime).
Note, if you’re struggling to locate your Macintosh HD drive, then open a Finder window and select ‘Go’ from the Mac menu bar, followed by ‘Computer.’
Use an AppleScript
Another way to disable your webcam across your Mac as a whole, is to download and run the iSight Disabler script:
- Download the iSight Disabler script and extract the .scpt file.
- Open a ‘Finder’ window and navigate to Macintosh HD/Library/Scripts.
- Create a new ‘iSight Disabler’ folder and add the .scpt file to this folder.
- Double-click the .scpt file. This will launch the AppleScript window.
- Click AppleScript’s ‘Play’ button (where the cursor is positioned in the following screenshot).

- When prompted, click ‘Disable iSight.’

Now, if you try to access the webcam you should see a notification that no webcam exists on your Mac.
If you do need to use your webcam at any point, then launch the iSight Disable script again, click the ‘Play’ button and then select the ‘Enable iSight’ button when prompted.
Just be aware that if someone does gain access to your Mac, they might be able to find a way to disable this script, so you should think of this as an additional layer of security rather than something that’s guaranteed to protect you from prying eyes.
Parental controls
If you have children who also use your Mac, then you may want to consider using your Mac’s Parental Controls to disable the webcam for their user account(s):
- Select the ‘Apple’ logo from your Mac’s menu bar, followed by ‘System preferences…’
- Select ‘Parental Controls.’
- Select the account you want to modify.
- Make sure the ‘Apps’ tab is selected.
- De-select the ‘Allow use of camera’ checkbox.

Monitoring webcam activity
The only way you can guarantee that no-one is spying on you via your webcam, is to physically cover the lens. Even the best applications, scripts, and other technical trickery are just an additional layer of security that makes it more difficult for hackers to access your webcam, but there’s no guarantee that they won’t find a way around these defences.
With this in mind, you may want to consider implementing an additional security mechanism that’ll alert you whenever a program tries to access your webcam or microphone. One third party app that does exactly this, is Oversight. Oversight is particularly useful as it can also identify malware that attempts to hijack your webcam or microphone by “piggybacking” on a trusted service such as Skype or FaceTime.
Once you’ve downloaded Oversight, launch the installer and then, when prompted, click the little umbrella icon in the Mac menu bar, and select ‘Preferences’

In the popup that appears, click the ‘Start’ button to set Oversight running. You can also open this dropdown at any time to view information about applications that are currently accessing your Mac’s webcam and microphone.
Stopping eavesdroppers
Your Mac’s webcam isn’t the only piece of hardware that hackers can turn against you – they may also be able to activate your Mac’s built-in microphone, potentially listening in on your conversations.
Placing a piece of tape over your Mac’s microphone will help muffle the sounds, and although it doesn’t quite have the same effect as placing a piece of tape over your webcam, it is a step towards making sure your private conversations remain private.
In addition to taping over your microphone, you may want to mute your microphone using your Mac’s system settings:
- Click the ‘Apple’ logo in your Mac’s menu bar.
- Select ‘System preferences…’ followed by ‘Sound.’
- Make sure ‘Internal Microphone’ is selected
- Scale the ‘Input Volume’ slider down to zero.

If you do need to use your microphone at some point, then you’ll need to navigate back to this menu and increase the ‘Input Volume’ value.
Just be aware that if someone does manage to gain access to your computer, then they may be able to change your microphone input volume settings, so again you shouldn’t rely on this method for ensuring your privacy.
Before you go
After spending over 20 years working with Macs, both old and new, theres a tool I think would be useful to every Mac owner who is experiencing performance issues.
CleanMyMac is highest rated all-round cleaning app for the Mac, it can quickly diagnose and solve a whole plethora of common (but sometimes tedious to fix) issues at the click of a button. It also just happens to resolve many of the issues covered in the speed up section of this site, so Download CleanMyMac to get your Mac back up to speed today.


Add Comment