

Macs have a reputation for being difficult to hack, but if someone has physical access to your laptop, then all of your passwords, encryption, and anti-malware software may not be enough to keep your data safe.
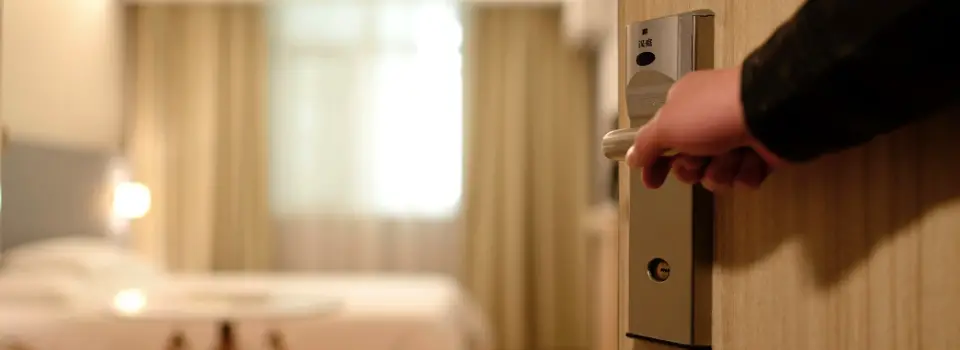
The thought of someone sneaking into your hotel room or office, logging into your Mac, and copying all of your data may sound far-fetched, but these “Evil Maid” attacks don’t have to look like a scene straight out of a spy movie!
Consider all the people who could potentially log onto your Mac when you’re not around, such as your roommates, landlord, parents or partner. If your Mac is a work laptop, then it’s accessible to all of your colleagues, plus everyone else who works in that building, including the cleaning and reception staff. If you regularly travel with your Mac, then this pool becomes even wider, and may include baggage handlers, receptionists, and even the staff who clean your room – which is why these attacks are commonly referred to as “Evil Maid” attacks.
Once someone’s physically logged into your Mac, there’s no limit to the amount of damage they can inflict, including sending work emails under your name; reading your private messages; hacking into your online bank account; installing spyware, or even plastering your sensitive files all over the Internet, for the whole world to see.
In this article, we’ll setup an app that’ll give you a heads-up if someone tries to physically hack into your Mac. This Do Not Disturb app continually monitors your laptop and will send you an email or an iPhone notification, as soon as someone lifts the lid of your Mac, which is a well-known precursor to Evil Maid attacks.
Protect yourself against Evil Maid attacks
For the best results, it’s recommended that you download Do Not Disturb to your Mac (free) and your iPhone ($0.99 per month or $9.99 for a year subscription).
By installing Do Not Disturb on both devices, you’ll get access to some powerful additional features that aren’t available on Mac alone, including:
- Receive a notification on your iPhone as soon as someone lifts the lid of your Mac. This means you can respond to the threat immediately.
- Snap a photo via your laptop’s webcam. You can then view this image on your iPhone, so you’ll know exactly who’s trying to hack into your Mac.
- Record screen activity and log all the commands being executed on your machine. This provides a detailed insight into what the perpetrator was doing on your machine, including whether they downloaded any spyware, malware, or other digital nasties.
- Shut down your computer remotely – guaranteed to stop a hacker in their tracks!
Configuring Do Not Disturb for your Mac
If you don’t want to shell out for the iPhone app, or you’d like to take Do Not Disturb for a test drive before committing to a subscription, then you can use Do Not Disturb as a Mac-only app.
To setup Do Not Disturb on your Mac:
- Head over to the Objective-See website and download the latest version of Do Not Disturb.
- Unzip the file, launch the subsequent installer, and follow the onscreen instructions to install.
- Once Do Not Disturb is installed, it’ll display an icon in your Mac’s menu bar. To configure Do Not Disturb, give this icon a click and then select ‘Preferences.’

- Make sure the ‘General’ tab is selected.
At this point, you’ll have access to the following options:
- Passive mode. Run Do Not Disturb without displaying any local alerts, so the hacker has no idea that they’re being monitored.
- No Icon mode. This option removes the Do Not Disturb icon from your Mac’s menu bar. This is handy for keeping an attacker in the dark, but it can also help keep your menu bar clutter-free.
- Touch ID mode. Do Not Disturb cannot differentiate between authorized or unauthorized lid open events, so by default you’ll receive a notification every single time your Mac’s lid is opened, even if you’re the one who opened it, which can quickly become annoying! If your Mac has a touch bar, then you can enable ‘Touch ID mode,’ which instructs Do Not Disturb to ignore any lid open events that are immediately followed by successful touch ID authentication.
- No Remote tasking. If you install Do Not Disturb on your iPhone, then you can respond to notifications by snapping a photo through your Mac’s webcam, or even shutting down your laptop remotely. These remote actions are some of Do Not Disturb’s most valuable features, but they rely on the mobile app being installed on your iPhone. If you have no plans to install the mobile app, then you may want to consider disabling remote tasking, as any unused features are potential loopholes that a hacker could exploit.
- Start at Login. Deselecting this item will prevent Do Disturb from logging in automatically at startup, although note that the components that monitor lid open events will still be running. If you want to disable Do Not Disturb completely, then you’ll need to select its icon in your Mac’s menu bar, and then select ‘Disable.’
Get an email notification about Evil Maid attacks
By default, every time the laptop lid is opened Do Not Disturb will display a notification in the upper-right of your Mac’s screen, but you can also specify a command, script or binary that Do Not Disturb should execute every time it detects a lid open event.
- Click the Do Not Disturb icon in your Mac’s menu bar.
- Select ‘Preferences.’
- Open the ‘Action’ tab.
- Select the ‘Execute action’ checkbox.
You can now copy/paste any supported script, into the accompanying text field.

If you don’t want to use the iPhone app, then a script can ensure you’re still notified about Evil Maid attacks. For example, the following script will send you an email every time Do Not Disturb detects a lid open event:
echo “lid opened” | mail -s “Do Not Disturb Alert” “[email protected]”
Just remember to replace “[email protected]” with your own email address!
If you do use this script, then run a test by opening and closing your Mac’s lid and then checking whether you receive an email notification. If no email appears in your inbox, then check that it hasn’t got lost in your Spam folder!
Record downloads, new users, peripherals, and more
Do Not Disturb doesn’t just notify you about lid open events – it can also record what happens immediately after these events.
To setup this monitoring, make sure the ‘Action’ tab is selected, and then select the ‘Monitor’ checkbox. Do Not Disturb will now log a range of events, for the first three minutes following a lid open event, including USB and Thunderbolt devices being attached to your Mac, user authentication events, and new processes and downloads.
You can view these logs at any time, by selecting the ‘Do Not Disturb’ icon from your Mac’s menu bar, and choosing ‘View log.’
Setting up Do Not Disturb on your iPhone
While email alerts can give you a heads-up that something nefarious is happening back at your hotel room or office, we all know how easy it is to miss an important email! To get the most out of Do Not Disturb, it’s recommended that you download the companion mobile app.
This iOS app is free to use for the first week, but after 7 days you’ll either need to sign up for a monthly ($0.99) or yearly ($9.99) subscription, in order to continue using Do Not Disturb for the iPhone.
- Download Do Not Disturb to your iPhone.
- Launch the app and select the ‘Add devices…’ button.
- On your Mac, select ‘Do Not Disturb’ from the menu bar, and then click ‘Preferences.’
- Select the ‘Link’ tab.
- Click ‘Generate QR code.’
- Scan the subsequent QR code, using your iPhone.
- After a few moments, your Mac should display a ‘Mobile Alerts and Actions Enabled’ notification.
Now, every time Do Not Disturb registers a lid open event, it’ll encrypt any sensitive information and then forward it to your iOS device, as an Apple Push Notification (APN) message. Touch the notification on your iOS device, and it’ll launch the Do Not Disturb app, with all the relevant information already loaded.
From here, you can choose to take a photo using your Mac’s webcam, or initiate a hard shut down, which is equivalent to running the ‘/sbin/shutdown -h now’ Terminal command. This hard shut down will also trigger FileVault disk encryption, if it’s setup on your Mac.
Just be aware…
Do Not Disturb can make your Mac more difficult to hack, by protecting it against a very specific security threat that isn’t covered by your typical anti-virus and anti-malware software. However, Do Not Disturb does have some restrictions that you should be aware of:
- Do Not Disturb exclusively monitors lid open events, so you must remember to close your Mac every time you leave it unattended. This also means that Do Not Disturb cannot detect physical attacks that don’t require opening the laptop’s lid, for example it’s possible to access your Mac’s hardware by flipping it over and unscrewing the back, which won’t trigger a Do Not Disturb alert.
- Do Not Disturb’s notifications rely on an active Internet connection, so make sure you setup your Mac to connect to the home, office or hotel Wi-Fi automatically.
- If you allow your iOS free trial to expire without purchasing a subscription, then Do Not Disturb will continue to function, but it won’t notify you about every lid open event. To make sure you don’t miss a notification, you should purchase a subscription by right- or left-swiping inside the app, or by selecting the menu button and then choosing ‘Subscription.’
Before you go
After spending over 20 years working with Macs, both old and new, theres a tool I think would be useful to every Mac owner who is experiencing performance issues.
CleanMyMac is highest rated all-round cleaning app for the Mac, it can quickly diagnose and solve a whole plethora of common (but sometimes tedious to fix) issues at the click of a button. It also just happens to resolve many of the issues covered in the speed up section of this site, so Download CleanMyMac to get your Mac back up to speed today.


Maybe I’m being extra thick here but whilst I see you’re trying to get subscriptions for the iOS app i don’t understand the para:
“Consider all the people who could potentially log onto your Mac when you’re not around, such as your roommates, landlord, parents or partner.”
1 How?
2 is being notified going to help really?
3 I also don’t see mention of filevault. Are you claiming filevault does not work?