

If you’re going to create any kind of home automation network, then your system needs to recognize when you arrive home, and when you walk out the door.
Whether you want your security camera to start recording when you leave for work in the morning; the front door to unlock when you pull up outside; or your lights to turn on and off intermittently while you’re away on holiday, then SmartThings needs to be able to track your movements.
In this article, I cover everything you need to know about SmartThings’ Presence Sensors, including how to setup additional sensors, which is crucial if you live with other people, or have friends and family who visit regularly!
I’ll also show you how to use Presence Sensors to create more powerful home automation rules, by teaching SmartThings to recognise when the house is completely empty, and then notify you of any suspicious activity that happens while you’re away.
What you’ll need
In this tutorial, I’m assuming you’ve already completed the following:
- Installed the SmartThings Hub somewhere in your home.
- Setup the SmartThings Classic app on your smartphone or tablet.
- Added a Multi Sensor to your SmartThings network.
- Setup the Multi Sensor to detect door open events. We’ll be expanding on this rule throughout this tutorial.
If you haven’t completed all of these steps, then check out the following articles:
You already have a presence sensor!
When you setup the SmartThings Classic app on your smartphone or tablet, SmartThings began using this device as a presence sensor automatically.
To see this in action:
- Launch the SmartThings Classic app on your smartphone or tablet.
- Select the “My Home” tab along the bottom of the screen.
- Make sure the “Things” tab is selected.
This screen displays all the smart devices that are currently connected to your network: including the smartphone or tablet where you installed the SmartThings Classic app. Assuming that you’re currently at home, this should read “Present.”

Select your smartphone or tablet, and you’ll see some basic information that SmartThings has logged about you, based on your presence sensor, including the time when you last arrived home.
Assuming you take your smartphone or tablet with you every time you leave the house, this is the only presence sensor you’ll need to create a home automation network that behaves differently depending on whether you’re home, or away. However, if you live with other people, then you’ll need to setup some additional presence sensors. You don’t want SmartThings switching off all the lights and setting the alarm when you leave for work in the morning, if your roommate is still in the building!
If you need to setup additional presence sensors, then you have two options: you can either install SmartThings Classic on the other person’s smartphone or tablet, or purchase a dedicated Presence Sensor.
1. Setting up a second smartphone or tablet as a presence detector
Today, most people have access to either a smartphone or tablet, so one of the quickest and easiest ways to detect whether another person is home, is to use their device as a presence sensor.
The downside is that you’ll both need to be logged into the same SmartThings account, which may be impractical if you’re sharing your home with people you don’t know too well, for example if you’re in student accomodation or recently acquired a new lodger, or you live with someone who can’t be trusted not to tinker around in the app and break all of your carefully-crafted home automation!
To setup an additional smartphone or tablet as a presence sensor:
- Install the SmartThings Classic app on the new device; you’ll find this app in both the Google Play Store and on iTunes.
- Launch the SmartThings Classic application.
- Tap “I’m a SmartThings User.”
- Enter the login details for your existing SmartThings account.
- Tap the “My Home” tab along the bottom of the screen.
- Make sure the “Things” tab is selected.
- Tap “Add a Thing.”
- Select “Add Device Manually.”
- Choose “Presence Sensors.”
- Tap “Mobile Phone.”
- Tap “Connect Now.”
- Give this device a name, and then tap “Save.”
After a few moments, this new device will appear on your network, and you can use it as a second presence sensor.
2. Using a dedicated presence detector device
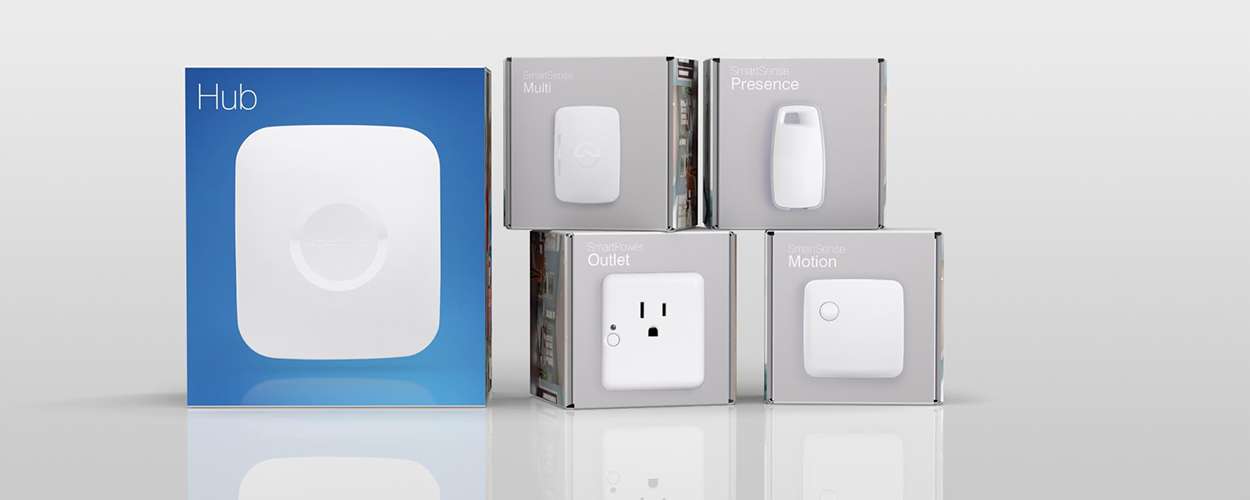
Samsung also sell a dedicated Presence Sensor. At this point, you may be wondering why anyone would pay for a dedicated device, when you can simply use your smartphone or tablet, but there’s several scenarios where you may benefit from purchasing a presence sensor.
While many people wouldn’t dream of leaving the house without their smartphone, there are still people who aren’t glued to their mobile phones 24/7 – and some of them may even occasionally venture outside without their mobile device! In particular, vulnerable adults or children may regularly leave the house without their smartphone or tablet, or may not own a compatible device. In these scenarios, attaching a presence sensor to their keys, bag or backpack can be a more reliable way of tracking their movements.
If you’re a pet owner, then attaching a presence sensor to your beloved pet’s collar can also help warn you when they’re up to no good, for example SmartThings could sound an alarm whenever it detects that your dog is no longer on your property. You could even use this sensor to track your pet’s movements around your home, so you get a heads-up whenever your cat is sat at the back door waiting to be let in, or when your dog has found a way into a room they know they’re not supposed to be in.
You can purchase a Presence Sensor separately, or as part of the SmartThings Starter Kit.
To setup the Presence Sensor:
- The sensor should come with a “Remove to Pair” tab; pull this tab to activate the Presence Sensor.
- Launch the SmartThings classic app, and select the “My Home” tab.
- Tap the “+” icon in the app’s upper-right corner.
- The app should now display a “Looking for devices…” message. After a few moments, it should detect the “Arrival Sensor.”
- Tap “Rename Device,” give this device a unique name and then tap “Done.”
- Tap “Save.”
- Read the onscreen message, and if you’re happy to proceed then tap “OK.” Your new Presence Sensor is now ready to use!
Monitor the doors and windows when you’re away
We’ve already seen how you can use a Multi Sensor to detect when a door is opened, and then send you notifications about any suspicious activity. Let’s combine this rule with our Presence Detector(s), so we only receive a notification when someone opens a door, if you’re not detected anywhere on the property.
If you haven’t previously setup the Multi Sensor, or created this rule, then check out our Securing your home with SmartThings article.
If you live alone, then you can setup SmartThings to warn you of door open events that happen while you’re in Away mode. However, if you live with other people then things become more complicated – just because your smartphone or tablet has entered Away mode, doesn’t necessarily mean the house is empty! When you’re dealing with multiple presence sensors, you need to differentiate between one sensor entering Away mode, and all registered presence sensors entering Away mode.
Let’s give SmartThings the ability to tell when the house is truly empty, by creating the following:
- A custom “Empty House” mode.
- A new “Everyone Leaves” routine, that’s triggered automatically when SmartThings detects the “Everyone leaves” event. This routine will switch your home automation network to “Empty House” mode.
We can then edit our door monitoring rule, so it’s triggered whenever SmartThings enters “Empty House” mode. This may seem like a lot of work, but we’re laying the foundations for future rules, for example further down the line you might want to set an alarm, turn off all the lights, and monitor additional doors and windows whenever SmartThings enters “Empty House” mode.
Creating your first custom mode
SmartThings comes with several preconfigured modes, but you can also create your own modes, via the online SmartThings IDE (Integrated Development Environment).
- Head over to the SmartThings IDE website and click “Log in.”
- Enter the email address that’s associated with your SmartThings account. Click “Next.”
- Enter your password, and then click “Sign in.”
- Once you’re successfully logged into the IDE, select “My Locations.”

- Find your location in the list (mine’s simply “Home”) and give it a click.
- Find “Modes,” and select its accompanying “Create new” link.

- Give your mode a name; I’m using “Empty house.”
- Click “Create.”
Creating your first custom routine
Now we have our mode, we need to ensure it’s triggered every time the house is empty. To achieve this, I’m going to create a “Everyone Leaves” routine that’ll run whenever the last presence sensor moves away from the property.
- In the SmartThings Classic app, select the “Automation” tab along the bottom of the screen.
- Select “Add a Routine.”
- Name this routine “Everyone Leaves.”
- Tap “Next.”
- Select “Change the mode to” and then tap “Empty house.” Tap “Done.”
- Select “Automatically perform….” followed by “Everyone leaves.”
- Tap “Which?”
- You should now see a list of all the presence sensors that are linked to your account; select every sensor in the list, and then tap “Done.”
- If you only want this routine to trigger on certain days, tap “Only on certain days of the week” and then select your days from the list. Tap “Done.”
- You may want to create a delay so that the “Goodbye” routine doesn’t trigger every time you step out of the house for a few minutes, for example if you pop to the garage or your outside bin. To set a delay, tap “Action delay time” and then enter a value in minutes.
- When you’re happy with your selections, tap “Save.”
Monitor doors and windows every time the house is empty
At this point, when the last person leaves your house the “Everyone Leaves” routine will run, and switch us over to “Empty house” mode. The last step, is configuring our door monitoring rule, so that it comes into effect whenever SmartThings enters “Empty house” mode.
- In the SmartThings Classic app, tap the “Smart Home Monitor” card.
- Tap the cog icon in the upper-right corner.
- Select “Custom.”
- Select the rule that you want to edit.
- Tap “Only when mode is” and then select “Empty house.” Tap “Done.”
- Save your changes.
You can test this setup right now, by manually triggering the “Everyone Leaves” routine and then checking whether you receive notifications about door open events:
- Select the “Automation” tab along the bottom of the app.
- Tap “Everyone Leaves.”
- Tap the lined icon in the upper-left corner, and you should see that you’re now in “Empty house” mode.
- Try opening the door that’s being monitored by the Multi Sensor: you should receive a notification on your smartphone!
Before you go
After spending over 20 years working with Macs, both old and new, theres a tool I think would be useful to every Mac owner who is experiencing performance issues.
CleanMyMac is highest rated all-round cleaning app for the Mac, it can quickly diagnose and solve a whole plethora of common (but sometimes tedious to fix) issues at the click of a button. It also just happens to resolve many of the issues covered in the speed up section of this site, so Download CleanMyMac to get your Mac back up to speed today.


Add Comment